Delicious No-Bake Vanilla Protein Cheesecake Jars – Quick Treats!
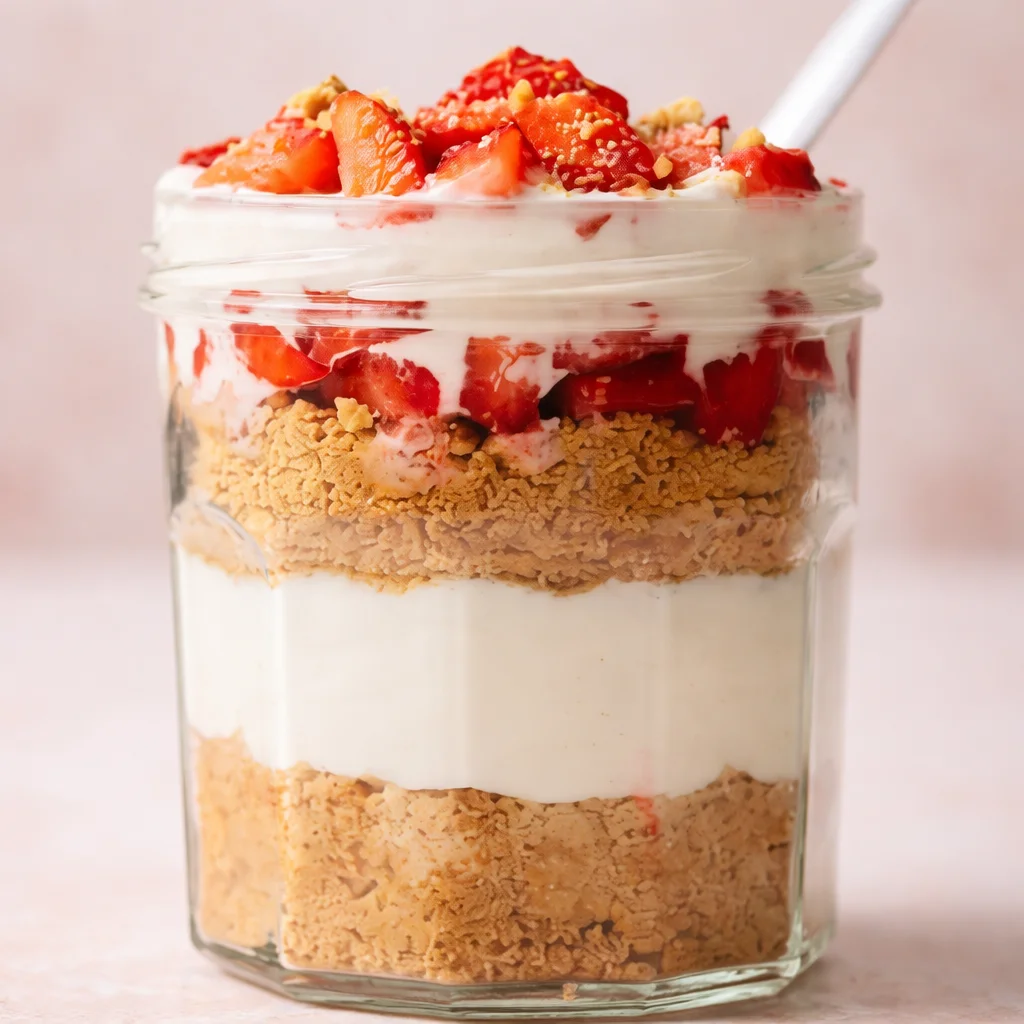
No-Bake Vanilla Protein Cheesecake Jars have basically saved me on those nights when I want something sweet but I do not want to turn on the oven or do a sink full of dishes. You know the feeling, you finish dinner, you want dessert, and suddenly you are too tired to do anything complicated. These little jars taste like a real treat, but they also sneak in protein so you feel satisfied after a few bites. Plus, they are cute, portable, and honestly kind of fun to eat straight from the jar. If you are into meal prep, this is one of those recipes you will make again and again. 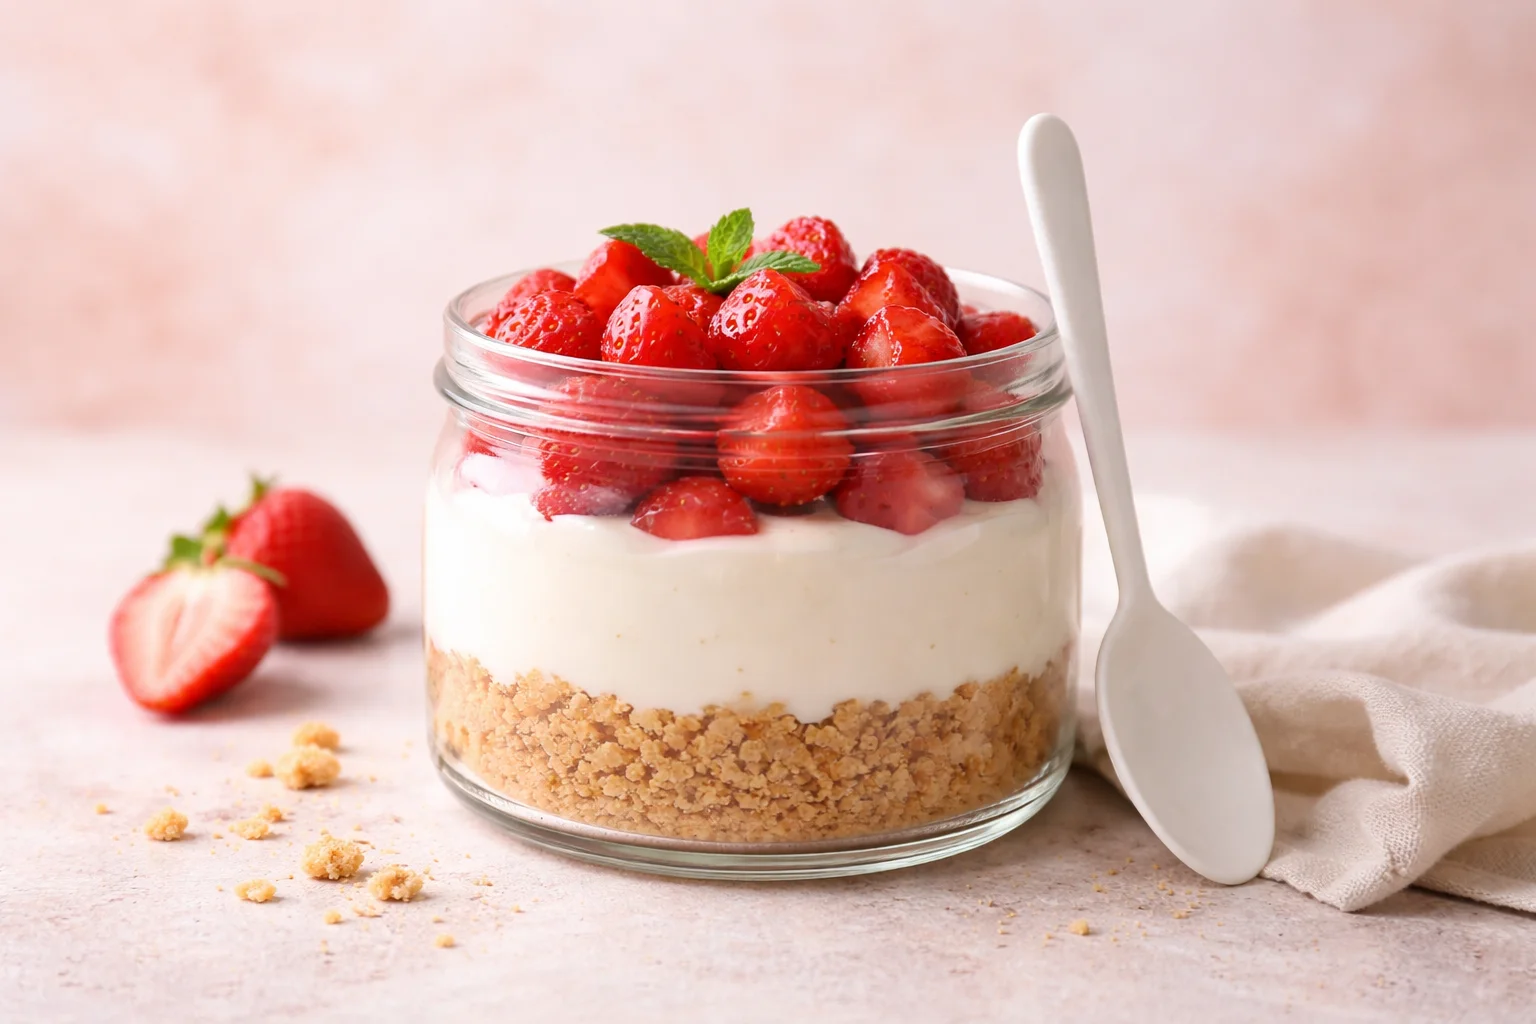
Why You’ll Love This Recipe
Let me tell you why I keep coming back to these No-Bake Vanilla Protein Cheesecake Jars. They hit that creamy cheesecake craving without the baking step, and they are easy to adjust based on what you have in the fridge.
Here is what makes them a go to:
- No oven needed, so it is perfect for warm days or lazy evenings.
- High protein without tasting like a chalky protein shake.
- Quick to assemble, especially if you crush the crumbs ahead of time.
- Portion friendly, since jars make it easy not to accidentally eat half a cheesecake.
- Customizable with toppings, crust options, and sweetness levels.
If you love easy no bake cheesecake vibes in general, you might also like these no-bake cheesecake balls for a poppable party snack moment.
How to Make No Bake Protein Cheesecake Jars
This is the part where you realize it is basically mix, layer, chill, and eat. I am sharing my favorite base version, then you can tweak it to fit your taste.
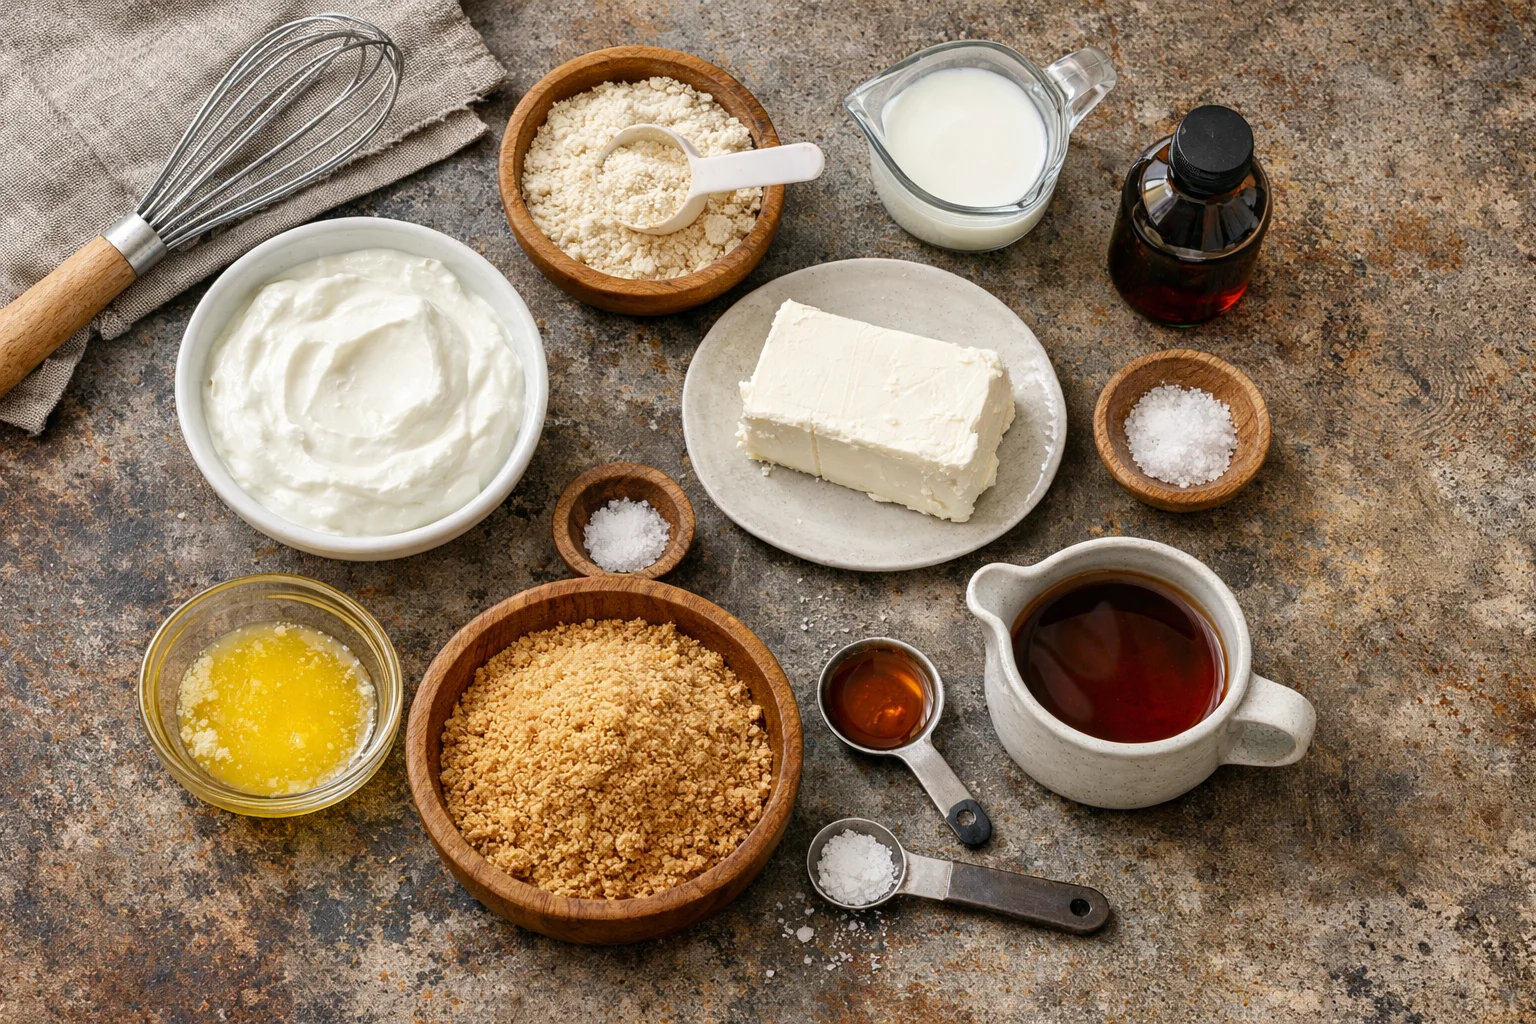
What you will need
- 1 cup plain Greek yogurt (0 percent or 2 percent both work)
- 4 oz cream cheese, softened
- 1 to 2 scoops vanilla protein powder (whey or a whey blend gives the smoothest texture)
- 2 to 3 tablespoons maple syrup or honey (optional, adjust to taste)
- 1 teaspoon vanilla extract
- Pinch of salt
- Crust: 3/4 cup graham cracker crumbs (or crushed cookies) plus 1 to 2 tablespoons melted butter
- Optional: a splash of milk to loosen the filling if it gets too thick
Step by step
1) Make the crust. Stir graham crumbs with melted butter until it looks like damp sand. If you like it a little sweeter, add a teaspoon of sugar, but honestly I usually skip it. Spoon the crust into the bottom of your jars and press lightly with the back of a spoon.
2) Mix the cheesecake layer. In a bowl, mix softened cream cheese until smooth. Add Greek yogurt, vanilla, salt, and protein powder. Stir until creamy. Taste it. If you want it sweeter, add maple syrup or honey. If it is too thick, add a tiny splash of milk and stir again.
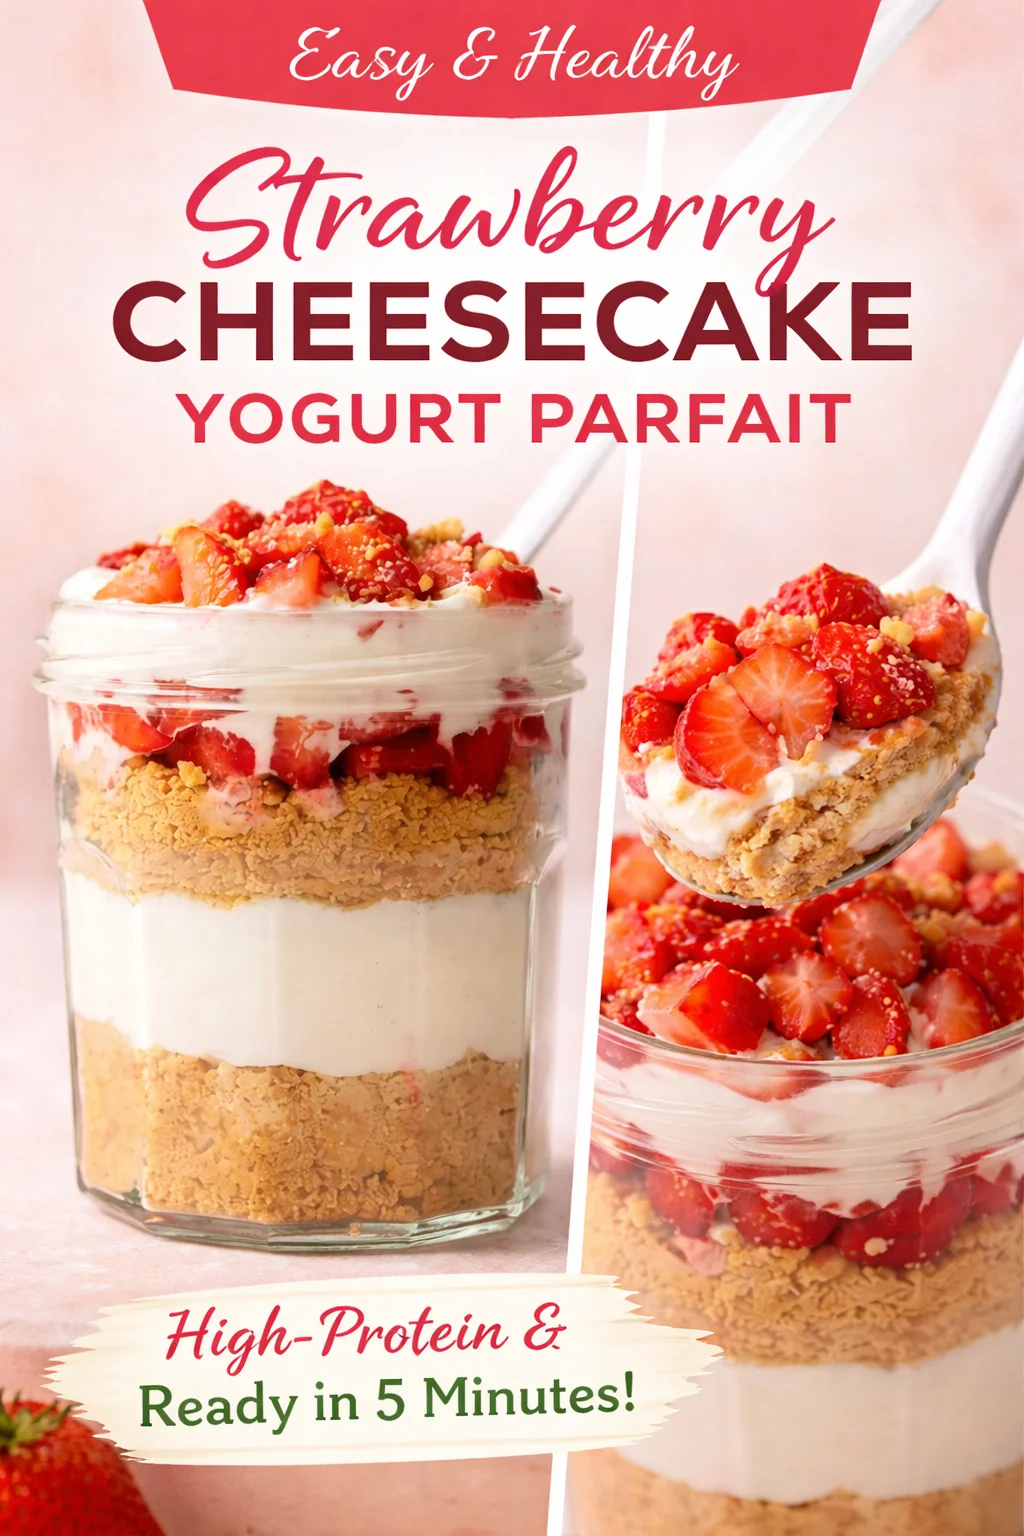
3) Layer it up. Spoon or pipe the filling into jars over the crust. I do about half crust, half filling, but you can do thinner layers if you want more of that parfait vibe.
4) Chill. Cover and refrigerate for at least 1 hour. Two hours is even better because the filling sets and the flavor tastes more like cheesecake.
Quick note on texture: Protein powder brands vary a lot. If your filling turns out a bit thicker than you like, loosen it with a spoonful of yogurt or a tiny splash of milk. If it is too loose, add a little more protein powder or chill longer.
And if you are the kind of person who likes bite sized desserts, these no-bake cheesecake bites are also great for keeping in the fridge for quick sweet grabs.
Tips and Tricks for the Best No Bake Cheesecake
I have made enough versions of these jars to know what works and what can get a little weird. Here are the little things that make your No-Bake Vanilla Protein Cheesecake Jars taste like a legit dessert instead of a protein experiment.
My best tips (so yours turn out right the first time)
Soften the cream cheese. If it is cold, you will fight lumps. I leave it out for 20 to 30 minutes, or microwave it for just a few seconds.
Use vanilla protein you actually like. If your protein powder tastes off in a shaker cup, it will not magically taste better in cheesecake. Pick one you enjoy.
Do not over sweeten right away. Mix everything first, then taste. Protein powder already has sweetness in most brands.
Let it chill. This is the hardest step because you want to dive in immediately. Chilling helps it set and makes the flavor feel more cheesecake like.
Make it thicker or lighter depending on your vibe. More cream cheese makes it richer and more classic. More yogurt makes it lighter and tangier.
“I made these for my after workout snack and my husband ate two jars before I even tried mine. He said it tasted like a real cheesecake dessert, not a protein thing. Total win.”
When I want another cozy high protein dessert idea for later in the week, I also make small batch protein brownies because they are rich and easy, and they keep me from buying random bakery stuff.
Cheesecake Topping Ideas
This is where you can make your jars look fancy with almost no effort. I love a simple topping, but if you are serving these to friends, a little extra on top makes them feel special.
My favorite topping ideas:
Fresh fruit: strawberries, blueberries, raspberries, sliced bananas.
Pie filling shortcut: cherry or blueberry spooned on top is ridiculously good.
Crunch: crushed graham crackers, chopped nuts, granola, mini chocolate chips.
Swirls: peanut butter, almond butter, melted chocolate, caramel sauce.
Jam moment: a spoonful of fruit jam mixed with a splash of water makes a quick sauce.
If you are into cherry desserts, you can totally go the cherry topping route and it gives serious cheesecake shop energy.
Storage
These jars are awesome for make ahead snacks and desserts. I usually make them on Sunday and then I have something sweet waiting for me all week.
How to store them:
Keep No-Bake Vanilla Protein Cheesecake Jars covered in the fridge. They hold up well for about 3 to 4 days. The crust softens slightly over time, which I personally do not mind at all. If you want the crust crunchier, store the crust separately and assemble closer to eating, or add a crunchy topping right before serving.
Can you freeze them? Yes, kind of. The texture changes a bit once thawed because yogurt can get slightly grainy. If you freeze them, thaw overnight in the fridge and stir the filling gently if needed. I prefer them fresh, but freezing works in a pinch.
Common Questions
Can I make these without protein powder?
Yes. Just skip it and sweeten to taste. You can also add a bit more cream cheese to keep the filling thick.
What if I only have flavored Greek yogurt?
You can use it, just reduce the added sweetener and maybe reduce the vanilla extract. Vanilla Greek yogurt is the easiest swap.
Do I need a blender or mixer?
Nope. A bowl and a spoon works. If you want it extra smooth and fast, a hand mixer helps, but it is not required.
How do I make it dairy free?
Use a dairy free cream cheese, a thick dairy free yogurt, and a plant based vanilla protein powder. The taste will change slightly, but it still works.
Why is my filling gritty?
That is usually the protein powder. Some powders need more time to hydrate. Chill the jars for a couple hours, and next time try a different brand or add a spoonful more yogurt.
A sweet little wrap up
If you want a dessert that feels fun but still fits into a higher protein day, No-Bake Vanilla Protein Cheesecake Jars are honestly one of the easiest wins. They are creamy, quick, and you can change the toppings a hundred different ways without getting bored. If you want more inspiration, I also like checking out High Protein Cheesecake Jars – Carmy – Easy Healthy-ish Recipes because it is always nice seeing other flavor ideas. Now go grab a few jars, mix up a batch, and stash one in the fridge for future you. You are going to be very happy you did.
No Bake Vanilla Protein Cheesecake Jars
A quick and easy dessert that satisfies your cheesecake cravings without the need for baking. Packed with protein and customizable toppings for a delightful treat.
Servings: 4 servings
Calories: 250kcal
Ingredients
For the cheesecake filling
- 1 cup plain Greek yogurt (0 percent or 2 percent)
- 4 oz cream cheese, softened Should be softened for easy mixing
- 1-2 scoops vanilla protein powder Whey or a whey blend gives the smoothest texture
- 2-3 tablespoons maple syrup or honey Optional, adjust to taste
- 1 teaspoon vanilla extract
- 1 pinch salt
For the crust
- 3/4 cup graham cracker crumbs (or crushed cookies)
- 1-2 tablespoons melted butter To mix with the crust
Optional additions
- splash of milk to loosen the filling if it gets too thick
Instructions
Preparation
- Make the crust. Stir graham crumbs with melted butter until it looks like damp sand. Spoon the crust into the bottom of your jars and press lightly with the back of a spoon.
- Mix the cheesecake layer. In a bowl, mix softened cream cheese until smooth. Add Greek yogurt, vanilla, salt, and protein powder. Stir until creamy. Taste it and adjust sweetness with maple syrup or honey if desired.
- Layer it up. Spoon or pipe the filling into jars over the crust.
- Chill. Cover and refrigerate for at least 1 hour, preferably 2 hours before serving.
Notes
Soften the cream cheese before mixing to avoid lumps. Use a protein powder that you enjoy, and let the jars chill for the best texture and flavor.
This is the part where you realize it is basically mix, layer, chill, and eat. I am sharing my favorite base version, then you can tweak it to fit your taste.
What you will need
- 1 cup plain Greek yogurt (0 percent or 2 percent both work)
- 4 oz cream cheese, softened
- 1 to 2 scoops vanilla protein powder (whey or a whey blend gives the smoothest texture)
- 2 to 3 tablespoons maple syrup or honey (optional, adjust to taste)
- 1 teaspoon vanilla extract
- Pinch of salt
- Crust: 3/4 cup graham cracker crumbs (or crushed cookies) plus 1 to 2 tablespoons melted butter
- Optional: a splash of milk to loosen the filling if it gets too thick
Step by step
1) Make the crust. Stir graham crumbs with melted butter until it looks like damp sand. If you like it a little sweeter, add a teaspoon of sugar, but honestly I usually skip it. Spoon the crust into the bottom of your jars and press lightly with the back of a spoon.
2) Mix the cheesecake layer. In a bowl, mix softened cream cheese until smooth. Add Greek yogurt, vanilla, salt, and protein powder. Stir until creamy. Taste it. If you want it sweeter, add maple syrup or honey. If it is too thick, add a tiny splash of milk and stir again.
3) Layer it up. Spoon or pipe the filling into jars over the crust. I do about half crust, half filling, but you can do thinner layers if you want more of that parfait vibe.
4) Chill. Cover and refrigerate for at least 1 hour. Two hours is even better because the filling sets and the flavor tastes more like cheesecake.
Quick note on texture: Protein powder brands vary a lot. If your filling turns out a bit thicker than you like, loosen it with a spoonful of yogurt or a tiny splash of milk. If it is too loose, add a little more protein powder or chill longer.
And if you are the kind of person who likes bite sized desserts, these no-bake cheesecake bites are also great for keeping in the fridge for quick sweet grabs.
Tips and Tricks for the Best No Bake Cheesecake
I have made enough versions of these jars to know what works and what can get a little weird. Here are the little things that make your No-Bake Vanilla Protein Cheesecake Jars taste like a legit dessert instead of a protein experiment.
My best tips (so yours turn out right the first time)
Soften the cream cheese. If it is cold, you will fight lumps. I leave it out for 20 to 30 minutes, or microwave it for just a few seconds.
Use vanilla protein you actually like. If your protein powder tastes off in a shaker cup, it will not magically taste better in cheesecake. Pick one you enjoy.
Do not over sweeten right away. Mix everything first, then taste. Protein powder already has sweetness in most brands.
Let it chill. This is the hardest step because you want to dive in immediately. Chilling helps it set and makes the flavor feel more cheesecake like.
Make it thicker or lighter depending on your vibe. More cream cheese makes it richer and more classic. More yogurt makes it lighter and tangier.
“I made these for my after workout snack and my husband ate two jars before I even tried mine. He said it tasted like a real cheesecake dessert, not a protein thing. Total win.”
When I want another cozy high protein dessert idea for later in the week, I also make small batch protein brownies because they are rich and easy, and they keep me from buying random bakery stuff.
Cheesecake Topping Ideas
This is where you can make your jars look fancy with almost no effort. I love a simple topping, but if you are serving these to friends, a little extra on top makes them feel special.
My favorite topping ideas:
Fresh fruit: strawberries, blueberries, raspberries, sliced bananas.
Pie filling shortcut: cherry or blueberry spooned on top is ridiculously good.
Crunch: crushed graham crackers, chopped nuts, granola, mini chocolate chips.
Swirls: peanut butter, almond butter, melted chocolate, caramel sauce.
Jam moment: a spoonful of fruit jam mixed with a splash of water makes a quick sauce.
If you are into cherry desserts, you can totally go the cherry topping route and it gives serious cheesecake shop energy.
Storage
These jars are awesome for make ahead snacks and desserts. I usually make them on Sunday and then I have something sweet waiting for me all week.
How to store them:
Keep No-Bake Vanilla Protein Cheesecake Jars covered in the fridge. They hold up well for about 3 to 4 days. The crust softens slightly over time, which I personally do not mind at all. If you want the crust crunchier, store the crust separately and assemble closer to eating, or add a crunchy topping right before serving.
Can you freeze them? Yes, kind of. The texture changes a bit once thawed because yogurt can get slightly grainy. If you freeze them, thaw overnight in the fridge and stir the filling gently if needed. I prefer them fresh, but freezing works in a pinch.
Common Questions
Can I make these without protein powder?
Yes. Just skip it and sweeten to taste. You can also add a bit more cream cheese to keep the filling thick.
What if I only have flavored Greek yogurt?
You can use it, just reduce the added sweetener and maybe reduce the vanilla extract. Vanilla Greek yogurt is the easiest swap.
Do I need a blender or mixer?
Nope. A bowl and a spoon works. If you want it extra smooth and fast, a hand mixer helps, but it is not required.
How do I make it dairy free?
Use a dairy free cream cheese, a thick dairy free yogurt, and a plant based vanilla protein powder. The taste will change slightly, but it still works.
Why is my filling gritty?
That is usually the protein powder. Some powders need more time to hydrate. Chill the jars for a couple hours, and next time try a different brand or add a spoonful more yogurt.
A sweet little wrap up
If you want a dessert that feels fun but still fits into a higher protein day, No-Bake Vanilla Protein Cheesecake Jars are honestly one of the easiest wins. They are creamy, quick, and you can change the toppings a hundred different ways without getting bored. If you want more inspiration, I also like checking out High Protein Cheesecake Jars – Carmy – Easy Healthy-ish Recipes because it is always nice seeing other flavor ideas. Now go grab a few jars, mix up a batch, and stash one in the fridge for future you. You are going to be very happy you did.
No Bake Vanilla Protein Cheesecake Jars
Ingredients
For the cheesecake filling
- 1 cup plain Greek yogurt (0 percent or 2 percent)
- 4 oz cream cheese, softened Should be softened for easy mixing
- 1-2 scoops vanilla protein powder Whey or a whey blend gives the smoothest texture
- 2-3 tablespoons maple syrup or honey Optional, adjust to taste
- 1 teaspoon vanilla extract
- 1 pinch salt
For the crust
- 3/4 cup graham cracker crumbs (or crushed cookies)
- 1-2 tablespoons melted butter To mix with the crust
Optional additions
- splash of milk to loosen the filling if it gets too thick
Instructions
Preparation
- Make the crust. Stir graham crumbs with melted butter until it looks like damp sand. Spoon the crust into the bottom of your jars and press lightly with the back of a spoon.
- Mix the cheesecake layer. In a bowl, mix softened cream cheese until smooth. Add Greek yogurt, vanilla, salt, and protein powder. Stir until creamy. Taste it and adjust sweetness with maple syrup or honey if desired.
- Layer it up. Spoon or pipe the filling into jars over the crust.
- Chill. Cover and refrigerate for at least 1 hour, preferably 2 hours before serving.
Notes
Similar Posts
Cherry Almond Chocolate Shortbread Cookies
Indulging in Cherry Almond Chocolate Shortbread Cookies brings together a delightful union of flavors that are sure to satisfy any sweet tooth. The combination of richly buttery shortbread, sweet-tart dried cherries, and smooth chocolate chips creates a wonderfully balanced cookie with a tender crumb. With the touch of almond extract enhancing every bite, these cookies…
Delicious Small-Batch Strawberry Kefir Popsicles for Summer Treats
How to Make Kefir Ice Pops What you will need Quick directions Tips for Perfect Popsicles Substitutions for Ingredients Storing and Unmolding Popsicles More Popsicle Recipes Common Questions A freezer treat you will actually make again Small-Batch Strawberry Kefir Popsicles are my go to fix for that specific summer problem when it is too hot…
Deliciously Easy Small Batch Coffee Cake (No Mixer, Streusel Topping)
What is Coffee Cake, exactly? Key Ingredients (Especially Sour Cream!) Why sour cream makes the best texture Cinnamon Crumb Coffee Cake Success Tips How to mix by hand without overworking Recipe Tips Variations & Different Pan Sizes Common Questions A cozy little send-off Small Batch Coffee Cake (No Mixer, Streusel Topping) is my go-to bake…
Blackberry Almond Shortbread Cookies
Rich, buttery shortbread cookies filled with the sweetness of dried blackberries and the crunch of almonds make for an irresistible treat. These Blackberry Almond Shortbread Cookies are not only delightful to eat but also simple to prepare, perfect for any occasion. The combination of these flavors creates a light, nutty, and fruity dessert that pairs…
Easy Chocolate Covered Cherries
Easy Chocolate Covered Cherries are a delightful treat that brings the perfect balance of sweetness and indulgence. Who doesn’t love the combination of luscious cherries wrapped in creamy chocolate? These delicious bites make a wonderful dessert for parties or a special treat to enjoy at home. Whether you’re preparing for a festive gathering or simply…
Healthy Peanut Butter Greek Yogurt Chocolate Fudge Cookies
Healthy Peanut Butter Greek Yogurt Chocolate Fudge Cookies are a delicious and guilt-free treat that satisfies your sweet tooth while providing a boost of nutrition. Imagine indulging in rich chocolate flavors with the creamy goodness of peanut butter, all while knowing you’re fueling your body with wholesome ingredients. These cookies are perfect for any occasion,…