Mom’s Old Fashioned Butter Tarts
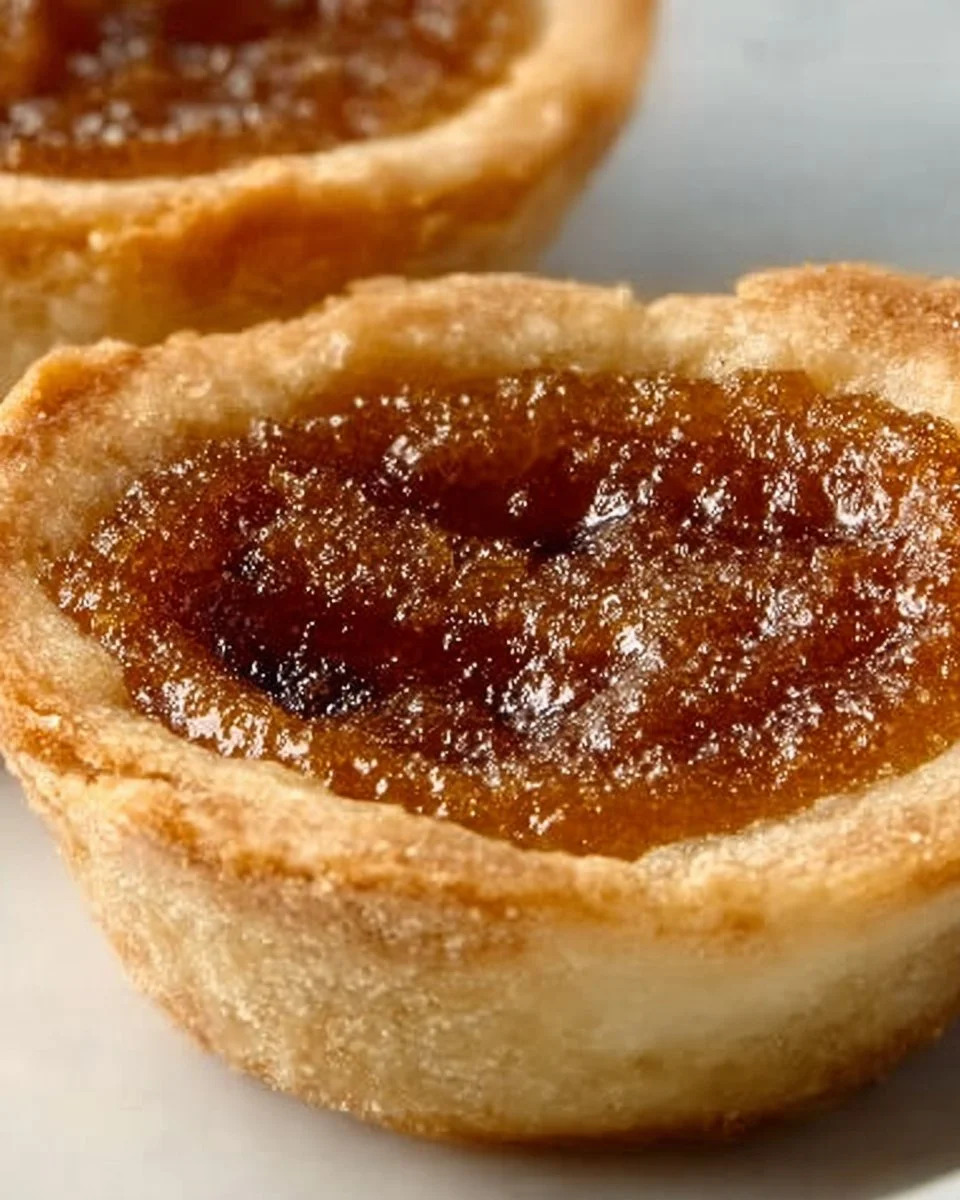
Mom’s Old Fashioned Butter Tarts are a sweet, nostalgic treat that many of us remember fondly from our childhood. These delightful little pastries are a staple in Canadian baking and offer the perfect balance of gooey sweetness and buttery richness. With a crisp, flaky pastry filled with a luscious buttery filling, they are irresistible. Whether you enjoy them as a comforting dessert or a sweet snack with your afternoon tea, these tarts never fail to please.
What You’ll Need for Mom’s Old Fashioned Butter Tarts
Here’s what you’ll need to whip up a batch of these delicious tarts:
- 330 grams All Purpose Flour
- 50 grams White Sugar
- 5 grams Salt
- 225 grams Unsalted Butter (chilled & cubed)
- 120 milliliters Water (chilled)
- 115 grams Unsalted Butter (softened)
- 100 grams Light Brown Sugar
- 150 milliliters Corn Syrup
- 2 Eggs (beaten)
- 5 milliliters Vanilla Extract
- 1 gram Salt
Step-by-Step Mom’s Old Fashioned Butter Tarts Recipe
- In a large mixing bowl, sift together the flour, salt, and sugar until well combined.
- Using a pastry blender or your hands, cut the chilled butter into the flour mixture until it resembles coarse meal. This step is crucial for achieving a flaky pastry.
- Gradually add the cold water, a little at a time, until the dough just begins to come together. Be careful not to overwork the dough.
- Gather the dough and shape it into a disk. Wrap it in plastic wrap and refrigerate for at least 30 minutes to chill.
- Once chilled, roll out the dough to about 1/8 inch thick. Use a 4-inch round cutter to cut out circles.
- Press each dough circle into greased muffin cups, taking care not to stretch the dough too much. This forms the base for your buttery filling.
- MAKE THE BUTTER FILLING: In a separate bowl, mix the softened butter, light brown sugar, corn syrup, beaten eggs, vanilla extract, and salt until smooth.
- Pour the filling into each tart shell, filling them about three-quarters full.
- Bake in a preheated oven at 180°C (350°F) for about 20-25 minutes or until the filling is set and the tops are golden.
How to Serve Mom’s Old Fashioned Butter Tarts
Serving these tarts is a delightful task! Allow them to cool slightly before removing from the muffin tin. These little beauties are best enjoyed warm but can also be served at room temperature.
For an added touch, dust them with powdered sugar or serve with a dollop of whipped cream on the side. Pair them with a cup of coffee or a warm cup of tea for the ultimate indulgence. These tarts also make great gifts for friends or loved ones, so consider packaging them beautifully for special occasions.
Expert Tips for Mom’s Old Fashioned Butter Tarts
- Chill Your Ingredients: Ensure your butter and water are chilled. Chilling the ingredients helps create a tender and flaky pastry.
- Don’t Overbake: Keep a close eye on the tarts towards the end of the baking time. You want the filling to set but not over-bake into a hard texture.
- Try Different Fillings: You can customize your butter tarts by adding ingredients like chocolate chips, pecans, or raisins for different flavor variations.
Mom’s Old Fashioned Butter Tarts FAQs
1. Can I make the pastry ahead of time?
Yes, you can prepare the pastry dough a day in advance and keep it wrapped in plastic in the fridge until you’re ready to use it.
2. How do I store leftover butter tarts?
Store the leftover tarts in an airtight container at room temperature for up to 3 days. You can also refrigerate them for longer freshness.
3. Can I freeze butter tarts?
Absolutely! You can freeze the unbaked tarts before adding the filling. Assemble them and freeze for up to a month. Just fill and bake when you’re ready to enjoy!
These Mom’s Old Fashioned Butter Tarts are a heartwarming treat that brings back childhood memories with every bite. They’re easy to make and delightful to share. Give this recipe a try, and let your kitchen fill with the wonderful aroma of fresh-baked tarts!
Mom's Old Fashioned Butter Tarts
Ingredients
For the pastry
- 330 grams All Purpose Flour
- 50 grams White Sugar
- 5 grams Salt
- 225 grams Unsalted Butter (chilled & cubed) Chilled butter helps create a flaky pastry.
- 120 milliliters Water (chilled) Chilled water is important for the dough.
For the filling
- 115 grams Unsalted Butter (softened)
- 100 grams Light Brown Sugar
- 150 milliliters Corn Syrup
- 2 units Eggs (beaten)
- 5 milliliters Vanilla Extract
- 1 gram Salt
Instructions
Preparation
- In a large mixing bowl, sift together the flour, salt, and sugar until well combined.
- Using a pastry blender or your hands, cut the chilled butter into the flour mixture until it resembles coarse meal.
- Gradually add the cold water, a little at a time, until the dough just begins to come together.
- Gather the dough and shape it into a disk. Wrap it in plastic wrap and refrigerate for at least 30 minutes.
- Once chilled, roll out the dough to about 1/8 inch thick and cut out circles with a 4-inch round cutter.
- Press each dough circle into greased muffin cups.
Making the Filling
- In a separate bowl, mix the softened butter, light brown sugar, corn syrup, beaten eggs, vanilla extract, and salt until smooth.
- Pour the filling into each tart shell, filling them about three-quarters full.
Baking
- Bake in a preheated oven at 180°C (350°F) for about 20-25 minutes or until the filling is set and the tops are golden.