German Spitzbuben Christmas Cookies

Delicious German Spitzbuben cookies with fruit filling for Christmas.

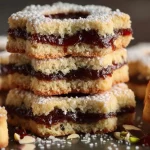
German Spitzbuben Christmas Cookies are a delightful addition to any holiday cookie platter. These delightful German treats feature a buttery, nutty flavor and are filled with sweet sour cherry jam. The tradition of making Spitzbuben cookies dates back centuries in Germany, where they are often enjoyed during Christmas festivities. With their beautiful cookie shapes and sweet filling, they’re sure to impress family and friends alike. Let’s dive into making these mouth-watering cookies that will fill your kitchen with delightful scents and warmth this holiday season!

What You’ll Need for German Spitzbuben Christmas Cookies

To create these delicious German Spitzbuben Christmas Cookies, gather the following ingredients:

  • 100 g (about 3.5 oz) macadamia nuts, almonds, or hazelnuts
  • 300 g (about 2.5 cups) sifted flour
  • 150 g (about 1.25 cups) powdered sugar
  • 1 pinch salt
  • 200 g (about 7 oz) butter, cooled
  • 1 egg
  • 1 tsp vanilla extract
  • 200 g (about 3/4 cup) sour cherry jam
  • 1 tbsp rum, vodka, or schnapps
  • 2 tbsp sugar (for Black Forest filling)
  • 2 tbsp cocoa powder (for Black Forest filling)
  • 1 to 2 tbsp kirsch (for Black Forest filling)

How to Make German Spitzbuben Christmas Cookies

Follow these steps to create your delicious German Spitzbuben Christmas Cookies:

  1. Toast the Nuts: Begin by toasting your chosen nuts (macadamia, almonds, or hazelnuts) in a pan without any oil. Once they are golden and fragrant, set them aside to cool completely.

  2. Mix Dry Ingredients: In a large bowl, mix the sifted flour and powdered sugar. Use a food processor to grind the cooled nuts into small pieces, adding a bit of the flour to prevent them turning into a paste. Combine the ground nuts with the flour mixture.

  3. Incorporate Wet Ingredients: Grate the cooled butter into the dry mixture. Add the egg and vanilla extract, then mix everything together until clumps start to form.

  4. Chill the Dough: Knead the dough into a ball, then divide it in two. Shape each piece into flat discs, wrap them in cling film, and chill in the refrigerator for at least 2 hours.

  5. Preheat and Roll Out: Preheat your oven to 180°C (375°F). Line two cookie sheets with parchment paper. Roll out the chilled dough to about 4 mm thick and cut out your desired shapes. Place the cookies on the baking sheets and freeze them for a few minutes before baking for 8 to 9 minutes.

  6. Cool the Cookies: Once baked, let the cookies cool completely on a wire rack.

  7. Prepare the Filling: In a bowl, mix the sour cherry jam with a tablespoon of your chosen liqueur. Spread this mixture on the bottom of half of the cookies.

  8. Assemble the Cookies: Dust the tops of the remaining cookies with powdered sugar, sandwich them together over the jam-filled cookies, and fill the centers with extra jam.

  9. Black Forest Variation: If you want to make a Black Forest filling, prepare the filling by boiling the jam with sugar and cocoa powder, then stir in kirsch. Use this filling in place of the sour cherry jam.

  10. Storage: Store your delicious cookies in an airtight container for several days, ensuring they remain fresh and delightful.

How to Serve German Spitzbuben Christmas Cookies

These delectable cookies make for an elegant holiday treat that can be enjoyed in many ways. Serve them on a festive platter at your holiday gatherings, alongside a warm cup of tea or coffee. They also pair beautifully with a scoop of vanilla ice cream for a delightful dessert twist.

For an added festive touch, you might consider sprinking festive-colored sprinkles on top of the jam before sandwiching. These cookies also make wonderful homemade gifts when packaged in a decorative box for family and friends.

Helpful Tricks for German Spitzbuben Christmas Cookies

  • Nut Options: Feel free to experiment with different nuts based on your preference. Almonds, hazelnuts, or macadamia nuts all create a unique flavor.

  • Chill Time is Key: Don’t rush the chilling process! Chilling the dough allows the flavors to meld and makes it easier to roll out.

  • Adjusting Sweetness: If you prefer less sweetness, reduce the amount of powdered sugar in the dough or the jam filling.

German Spitzbuben Christmas Cookies FAQs

Q: Can I use a different type of jam?
A: Absolutely! While sour cherry jam is traditional, feel free to use your favorite fruit jam for a personal touch.

Q: How long do these cookies last?
A: When stored in an airtight container, these cookies can last for several days. They may even taste better after a day or two as the flavors continue to meld.

Q: Can I freeze the cookies?
A: Yes! You can freeze the baked cookies. Just ensure they are layered with parchment paper in between to avoid sticking.

Bring the taste of German tradition into your home with these delightful German Spitzbuben Christmas Cookies. They’re not just cookies; they’re a sweet treat filled with holiday cheer. Enjoy the baking process, share with loved ones, and savor every bite! Happy baking!

German Spitzbuben Christmas Cookies

Delightful German cookies featuring a buttery, nutty flavor filled with sweet sour cherry jam, perfect for holiday festivities.
Prep Time1 hour
Cook Time10 minutes
Total Time1 hour 10 minutes
Course: Dessert, Snack
Cuisine: German
Keyword: Christmas Cookies, German Cookies, Holiday Baking, Sour Cherry Jam, Spitzbuben Cookies
Servings: 24 cookies
Calories: 150kcal

Ingredients

For the Cookie Dough

  • 100 g macadamia nuts, almonds, or hazelnuts Toast these nuts before adding.
  • 300 g sifted flour
  • 150 g powdered sugar
  • 1 pinch salt
  • 200 g butter, cooled Grated into the mixture.
  • 1 ea egg
  • 1 tsp vanilla extract

For the Filling

  • 200 g sour cherry jam Mixed with liqueur for filling.
  • 1 tbsp rum, vodka, or schnapps Choose your favorite liqueur.
  • 2 tbsp sugar For Black Forest filling.
  • 2 tbsp cocoa powder For Black Forest filling.
  • 1 to 2 tbsp kirsch For Black Forest filling.

Instructions

Preparation

  • Toast the nuts in a pan without any oil until golden and fragrant, then let them cool.
  • In a large bowl, mix the sifted flour and powdered sugar. Process the cooled nuts into small pieces and combine with the flour mixture.
  • Grate the cooled butter into the dry mixture, add the egg and vanilla extract, and mix until clumps form.
  • Knead the dough into a ball, divide it in two, shape into flat discs, wrap in cling film, and chill for at least 2 hours.

Baking

  • Preheat the oven to 180°C (375°F) and line two cookie sheets with parchment paper.
  • Roll out the chilled dough to about 4 mm thick, cut out shapes, and freeze them for a few minutes.
  • Bake for 8 to 9 minutes until lightly golden. Let cool on a wire rack.

Assembling

  • Mix the sour cherry jam with liqueur and spread it on half of the cookies.
  • Dust the tops of the remaining cookies with powdered sugar and sandwich them over the jam-filled cookies.
  • Fill the centers with extra jam.

Black Forest Variation

  • For a variation, boil the jam with sugar and cocoa powder, then stir in kirsch.
Notes

Store in an airtight container for freshness. These cookies can be frozen; layer them with parchment paper to avoid sticking.

Similar Posts

  • New York Crumb Cake

    New York Crumb Cake is a classic bakery treat that’s adored by many. The combination of a soft, moist cake base topped with a rich, crumbly topping is simply irresistible. Whether you’re enjoying it during breakfast, having it as an afternoon snack, or serving it at a gathering, this cake is sure to please everyone….

  • Delicious No-Sugar Chocolate Banana Ice Cream Sandwiches Recipe

    No-Sugar Chocolate Banana Ice Cream Sandwiches are my go to fix when I want something cold and chocolatey but I do not want a sugar crash after. You know that moment when you want dessert, but also want to feel good about it? That is exactly where these little sandwiches live. They are creamy, sweet in a real banana kind of way, and honestly pretty fun to make. I started making them during hot afternoons when my freezer was packed with random bananas I forgot about. Now they are a regular thing around here, especially when I want a treat that still feels like real food.  How to make this vegan chocolate banana ice cream This is the part where you realize you do not need an ice cream machine, fancy ingredients, or a long ingredient list. The base is just frozen bananas plus cocoa powder, and then you can build from there. What you will need If you are in a banana baking mood too, you might also like these super moist chocolate chip banana bread slices for breakfast the next day. I swear bananas are either on the counter for one hour, or they are suddenly brown and begging to be used. Quick directions (my real life method) Drop the frozen banana slices into a food processor or a strong blender. Add cocoa powder, a small splash of plant milk, vanilla if using, and that pinch of salt. Blend, scrape down, blend again. At first it looks crumbly and like it will never turn into anything, but keep going. It turns into a thick soft serve texture, and that is your vegan chocolate banana ice cream. Now for the sandwiches. Scoop the chocolate nice cream onto one cookie, top with another cookie, and gently press. If the nice cream is super soft, you can freeze the assembled sandwiches for 30 to 60 minutes so they firm up and become easier to eat. Sometimes I roll the sides in chopped nuts or cacao nibs if I have them. Sometimes I do nothing and just eat one over the sink. Both options are valid. What makes these ice cream sandwiches healthy? I am not into calling desserts magic health food, but these truly are a better option when you want something sweet without added sugar. The sweetness comes from fruit, and the texture comes from the frozen banana doing its thing. That is why No-Sugar Chocolate Banana Ice Cream Sandwiches feel like a treat, but still sit lightly. Here is what I love about them: For the cookie part, you can keep it simple. If you already have a banana based snack in your rotation, these delicious small batch banana oatmeal cookies no flour no sugar are honestly a great jumping off point. They are naturally sweet, and they freeze well too, which makes them perfect sandwich material. “I made a batch on Sunday and my kids thought it was regular ice cream. The best part is I did not have to argue about dessert turning into a sugar frenzy. We are keeping these in the freezer all summer.” How do you freeze bananas for nice cream? Freezing bananas sounds easy, and it is, but there are a couple little things that make the blending part so much smoother. If you freeze bananas the right way, you will get that thick creamy texture instead of icy chunks that fight your blender. Here is my method: 1) Use ripe bananas. You want the peels to have lots of brown spots. That is where the sweetness is. 2) Slice them before freezing. I do coins, about half an inch thick. Whole frozen bananas are a pain to blend. 3) Freeze on a tray first. Lay slices on parchment so they do not freeze into one giant banana brick. After they are frozen solid, toss them into a freezer bag or container. 4) Label the bag. This sounds extra until you find five mystery freezer bags later. If you are like me and end up with extra bananas every week, you might also enjoy baking them into banana chocolate chip mini muffins. I make those when I want something grab and go, and I freeze a few for later just like I do with banana slices. One more thing. If your blender is struggling, let the banana slices sit on the counter for 3 to 5 minutes. Not long enough to melt, just enough to take the icy edge off. What is Nice Cream? Nice cream is basically the internet nickname for blended frozen bananas that turn into an ice cream like texture. The banana acts like the creamy base, so you do not need heavy cream, condensed milk, or added sugar to make it satisfying. The flavor is super customizable. You can turn it into chocolate, peanut butter, strawberry, coffee, or even a cinnamon vibe. For this recipe we are going all in on chocolate banana, which is why these No-Sugar Chocolate Banana Ice Cream Sandwiches taste like a real dessert even though the base is fruit. Nice cream is best right after blending if you like soft serve. If you want scoopable and firm, freeze it for 1 to 2 hours in a container. Just know that it freezes harder than regular ice cream, so you may need to let it sit out a few minutes before scooping. Also, if you love no sugar added chocolate desserts, I have to point you to this cozy one: indulgent small batch coconut milk chocolate pudding no sugar added. It hits that same chocolate craving in a different way. A few tips for the perfect chocolate banana ice cream every time I have made this enough times to know where things can go weird. Here are the tips that keep it smooth, chocolatey, and sandwich worthy. Do not add too much plant milk at the start. Start with one tablespoon, then add more only if your machine needs help. Too much liquid makes it more like a smoothie, and then it leaks out of the cookies. Use good cocoa powder. You do not need fancy, but use one you actually like the taste of. If it tastes bitter in your pantry, it will taste bitter in your nice cream. Salt matters. A tiny pinch makes the chocolate taste deeper. Not salty, just better. Freeze the sandwiches after assembling. If you want that classic ice cream sandwich bite, freeze them on a tray first, then wrap individually. They keep well for about 2 weeks, though in my house they disappear faster. Cookie options that work. You want something that is sturdy enough to hold up, but not so hard that it is tough to bite when frozen. If you need another chocolate snack idea, these chocolate almond bites can be a fun side treat with your coffee while the sandwiches chill. Make them mini. This is my sneaky trick for portioning without feeling restricted. Mini No-Sugar Chocolate Banana Ice Cream Sandwiches are also easier for kids, and they freeze faster. Common Questions 1) Do these taste like bananas?  Yes, but in a good way. Chocolate covers a lot of it, and using ripe bananas makes it taste more like natural sweetness than banana flavoring. 2) Can I make these without a food processor?  A high powered blender works, but you will need to stop and scrape more often. If it is a small blender, blend in batches and use a little plant milk to help it move. 3) How long do they last in the freezer?  About 2 weeks for best texture. Wrap them individually so they do not pick up freezer smells. 4) Why did my nice cream turn icy?  Usually it is too much liquid, or the bananas were not ripe enough. Ripe bananas and minimal milk make it creamy. 5) Can I add peanut butter or protein powder?  Peanut butter is amazing, start with one tablespoon. Protein powder can work, but it can make the texture thicker and a bit chalky depending on the brand, so add slowly. Freezer friendly dessert that actually hits the spot If you try these No-Sugar Chocolate Banana Ice Cream Sandwiches, you will see why I keep bananas in my freezer like it is my job. They are simple, flexible, and they satisfy that chocolate craving without needing added sugar. Keep a batch stashed for late night cravings, hot afternoons, or the moment you want dessert but still want to feel good after. If you want another similar idea, this linked recipe for Healthy 4-Ingredient Chocolate Banana Ice Cream is also a great reference for extra variations. Now go rescue those ripe bananas on your counter and make yourself a couple sandwiches for later.  These No-Sugar Chocolate Banana Ice Cream…

  • Pineapple Cranberry Holiday Cheese Log

    Pineapple Cranberry Holiday Cheese Log is the perfect addition to your holiday gatherings! With its delightful sweet and savory flavors, this creamy cheese log is sure to impress your friends and family. The combination of tangy cream cheese, sharp cheddar, and a beautiful array of cranberries and pineapple creates a festive treat that’s as pleasing…

  • Canadian Cozy Apple Kringle with Vanilla Glaze

    Apple Kringle with Vanilla Glaze Recipe is a must-try! This delightful pastry is a true show-stopper, perfect for gatherings or simply enjoying a sweet treat at home. With the perfect balance of tender dough, spiced apples, and a sweet vanilla drizzle, it’s hard to resist a slice of this heavenly creation. Originating from the Scandinavian…

  • Delicious Chia Seed Pudding for Weight Loss – 5 Tasty Recipes!

    Popular Toppings for Chia Seed Pudding Different Flavors To Make 1. Classic Vanilla Dream 2. Chocolate Espresso Boost 3. Berry Cheesecake Jar 4. Tropical Matcha Morning 5. Peanut Butter Banana Crunch Meal Prepping Your Pudding Troubleshooting Chia Seed Pudding Serving Suggestions Common Questions A Sweet Little Wrap Up Chia Seed Pudding for Weight Loss can…

Leave a Reply

Your email address will not be published. Required fields are marked *

Recipe Rating