Delicious Small-Batch Chocolate Collagen Brownie Bites to Savor
Small-Batch Chocolate Collagen Brownie Bites are my answer to those nights when I want something deeply chocolatey but I do not want a whole tray of brownies sitting on the counter calling my name. You know the vibe, you have a little sweet craving, you want a cozy treat, and you also want to feel good after you eat it. These little bites are fudgy, quick, and honestly kind of adorable. They are also flourless and gluten free, which makes them perfect for sharing with friends who have different food needs. Let me walk you through exactly how I make them, plus the small tweaks that help them turn out right every time.
About These Flourless Gluten Free Cheesecake Brownies
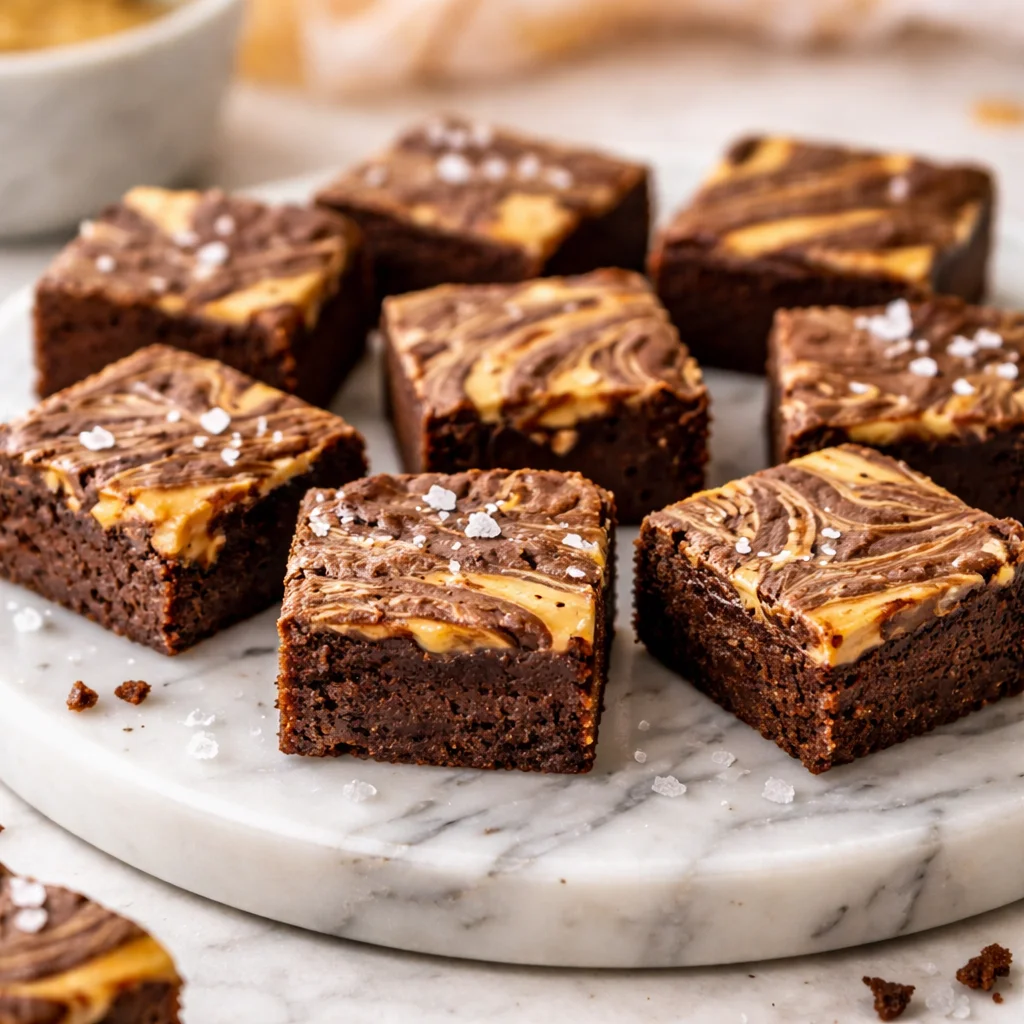
So here is the deal. I started making these as brownie bites, then I got a little playful and added a simple cheesecake swirl because I love that tangy pop against rich chocolate. The result is basically a mashup of a brownie bite and a mini cheesecake brownie, except it is flourless and super easy to pull off in a small batch.
The brownie base is made with cocoa powder, eggs, and a bit of fat, so it bakes up dense and fudgy instead of cakey. Then the cheesecake part is just cream cheese, a little sweetener, and vanilla. If you have ever made cheesecake brownies before, this is the no stress version.
And since I am calling these Small-Batch Chocolate Collagen Brownie Bites, yes, there is collagen in the mix. I like adding it because it blends in easily and gives me a little protein boost. It does not turn them into a health bar or anything, they still taste like a real dessert.
If you are in a brownie mood in general, you might also like my quicker, classic style pan version here: quick and easy small batch brownies under 30 minutes. I make those when I want clean slices, and these bites when I want something poppable.
I made these for a girls night and everyone thought they came from a fancy bakery. The cheesecake swirl is so good, and the batch size is perfect because we actually finished them. I will be making them again this weekend.
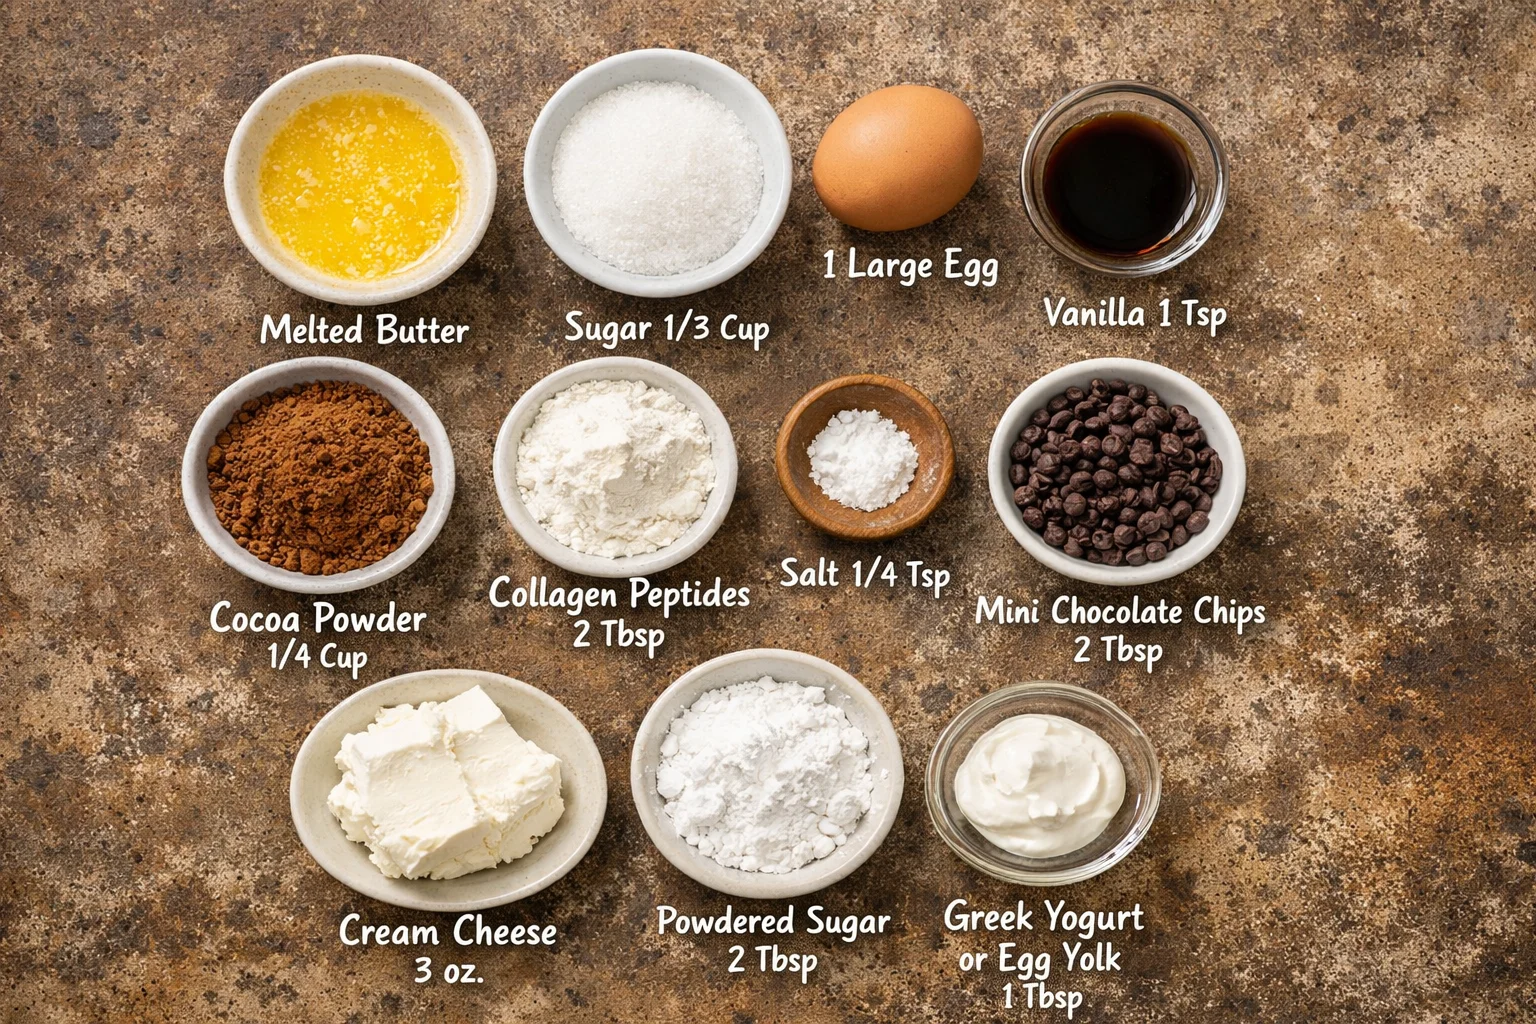
Ingredients and Substitutions
Here is what you will need. I am keeping it straightforward, and I will tell you where you can swap things without messing up the texture.
For the brownie bite batter
- Unsalted butter, melted, or coconut oil for a dairy free option
- Granulated sugar or coconut sugar for a slightly deeper flavor
- Egg, room temp helps the batter mix smoothly
- Vanilla extract
- Unsweetened cocoa powder, this is the main chocolate flavor, so use one you like
- Chocolate collagen peptides or unflavored collagen (if using unflavored, add an extra teaspoon of cocoa)
- Salt, do not skip it, it makes the chocolate taste bigger
- Mini chocolate chips, optional, but very fun
For the cheesecake swirl
- Cream cheese, softened
- Powdered sugar or a powdered sugar alternative
- Vanilla extract
- 1 egg yolk or a spoonful of Greek yogurt (either helps it swirl smoothly)
Substitution notes from my kitchen
If you want these fully dairy free, use coconut oil in the brownie and a dairy free cream cheese for the swirl. Just know that dairy free cream cheese can be a little softer, so chill the bites before serving if they feel too gooey. If you are out of cocoa powder, you cannot really replace it with melted chocolate one for one in this recipe without changing the balance, so I would save this for a day you have cocoa.
If you are into small batch chocolate treats in general, you might like these cookie vibes too: small batch chocolate shortbread cookies. They are a totally different texture, but same cozy chocolate energy.
Best Recipe Tips
Little things that make a big difference
I am not trying to turn this into a science project, but there are a few tips that keep these bites fudgy and pretty.
Use a mini muffin pan if you have one. It gives you that perfect brownie bite shape and makes the edges slightly chewy. If you only have a regular muffin pan, it still works, just bake a little longer and expect fewer pieces.
Do not overbake. These should look set around the edges but still a tiny bit soft in the middle. They firm up as they cool. Overbaking is the fastest way to lose that brownie bite magic.
Swirl gently. I use a toothpick and make a few simple figure eights. If you swirl too much, it turns into a pinky tan batter and you lose that pretty contrast.
Collagen tip: Whisk the collagen into the cocoa powder first. That helps it disappear into the batter with no little clumps.
Want them extra dessert like? Sprinkle a few mini chocolate chips on top right before baking. It looks cute and gives you those melty puddles.
When I am craving something similar but with more of a protein brownie feel, I make these: deliciously chewy small batch protein brownies gluten free. Different recipe, same small batch satisfaction.
Video Tutorial
What you will see if you watch
If you are the type who likes to watch a recipe once before jumping in, the video is really helpful here. You will see how thick the brownie batter should look, how soft the cream cheese mixture needs to be, and what I mean by a gentle swirl. I also show the exact “done” look, because honestly that is what most people worry about with brownie bites.
One more thing you will catch in the video is that I tap the pan on the counter once before baking. It helps the batter settle into the corners and makes the tops smoother. Tiny move, but it makes them look more bakery style.
Get the Recipe: Flourless Gluten Free Cheesecake Brownie Recipe
Step by step, small batch style
This is written for a mini muffin pan and makes about 12 to 16 brownie bites, depending on how full you fill the cups.
What you will need
- Mini muffin pan
- Mixing bowl and whisk
- Small bowl for the cheesecake swirl
- Toothpick or skewer for swirling
Ingredients
Brownie layer:
- 4 tablespoons butter, melted
- 1/3 cup sugar
- 1 large egg
- 1 teaspoon vanilla
- 1/4 cup unsweetened cocoa powder
- 2 tablespoons collagen peptides (chocolate or unflavored)
- 1/4 teaspoon salt
- 2 tablespoons mini chocolate chips, optional
Cheesecake swirl:
- 3 ounces cream cheese, softened
- 2 tablespoons powdered sugar
- 1/2 teaspoon vanilla
- 1 egg yolk or 1 tablespoon Greek yogurt
Directions
1) Heat your oven to 350 F. Lightly grease a mini muffin pan or use mini liners.
2) In a bowl, whisk melted butter and sugar. Add the egg and vanilla and whisk until smooth and glossy.
3) In a small bowl, mix cocoa powder, collagen, and salt. Add that into the wet mixture and stir until the batter looks thick and smooth. Fold in chocolate chips if using.
4) In another small bowl, mix cream cheese, powdered sugar, vanilla, and egg yolk (or Greek yogurt) until smooth. If it feels lumpy, keep stirring, it will come together as the cream cheese softens.
5) Spoon brownie batter into each mini cup, filling about 2/3 full. Add a small dab of cheesecake mixture on top of each one.
6) Use a toothpick to swirl each bite with a few gentle turns.
7) Bake 10 to 13 minutes. The tops should look set and slightly shiny, and the centers should not look wet.
8) Cool in the pan for 10 minutes, then lift them out. For the cleanest bite texture, let them cool fully. For the gooiest bite texture, eat one warm. No judgment.
Storage
Because of the cheesecake swirl, I store these in the fridge in a covered container for up to 4 days. They are amazing chilled, but I often let them sit on the counter for 10 minutes so they lose that cold edge.
Serving ideas
These Small-Batch Chocolate Collagen Brownie Bites are great plain, but if you want to make them feel like a full dessert moment, try them with berries, a spoon of whipped cream, or a tiny drizzle of peanut butter. If you are packing them for a snack, they travel well once fully cooled.
Common Questions
1) Do these actually taste like collagen?
Nope. In these Small-Batch Chocolate Collagen Brownie Bites, the cocoa and vanilla cover it. I recommend mixing the collagen with the cocoa first to avoid clumps.
2) Can I make them without the cheesecake swirl?
Absolutely. Just bake the brownie batter as is. Start checking around 9 to 12 minutes since they may bake a touch faster without the extra topping.
3) How do I know when brownie bites are done?
The edges look set, the tops look slightly shiny, and a toothpick comes out with moist crumbs, not wet batter. They keep cooking a little as they cool.
4) Can I freeze them?
Yes. Freeze in a single layer first, then move to a freezer bag. Thaw in the fridge overnight. The texture stays fudgy, especially if you do not overbake.
5) What if I only have a regular muffin tin?
It works, you will just get bigger bites and fewer of them. Bake longer, usually 14 to 18 minutes, and keep an eye on the centers.
A sweet little wrap up (and what to bake next)
If you are craving a chocolate treat but you do not want a huge pan tempting you all week, these Small-Batch Chocolate Collagen Brownie Bites are such a good move. They are fudgy, simple, and the cheesecake swirl makes them feel special without extra effort. Keep your bake time on the shorter side, let them cool, and you will get that perfect brownie bite texture. And if you want to explore a similar idea from another baker, I have bookmarked Flourless Gluten Free Cheesecake Brownies – Hummingbird High for extra inspiration. Now go grab your cocoa, make a small batch, and tell me if you eat the first one warm like I always do.
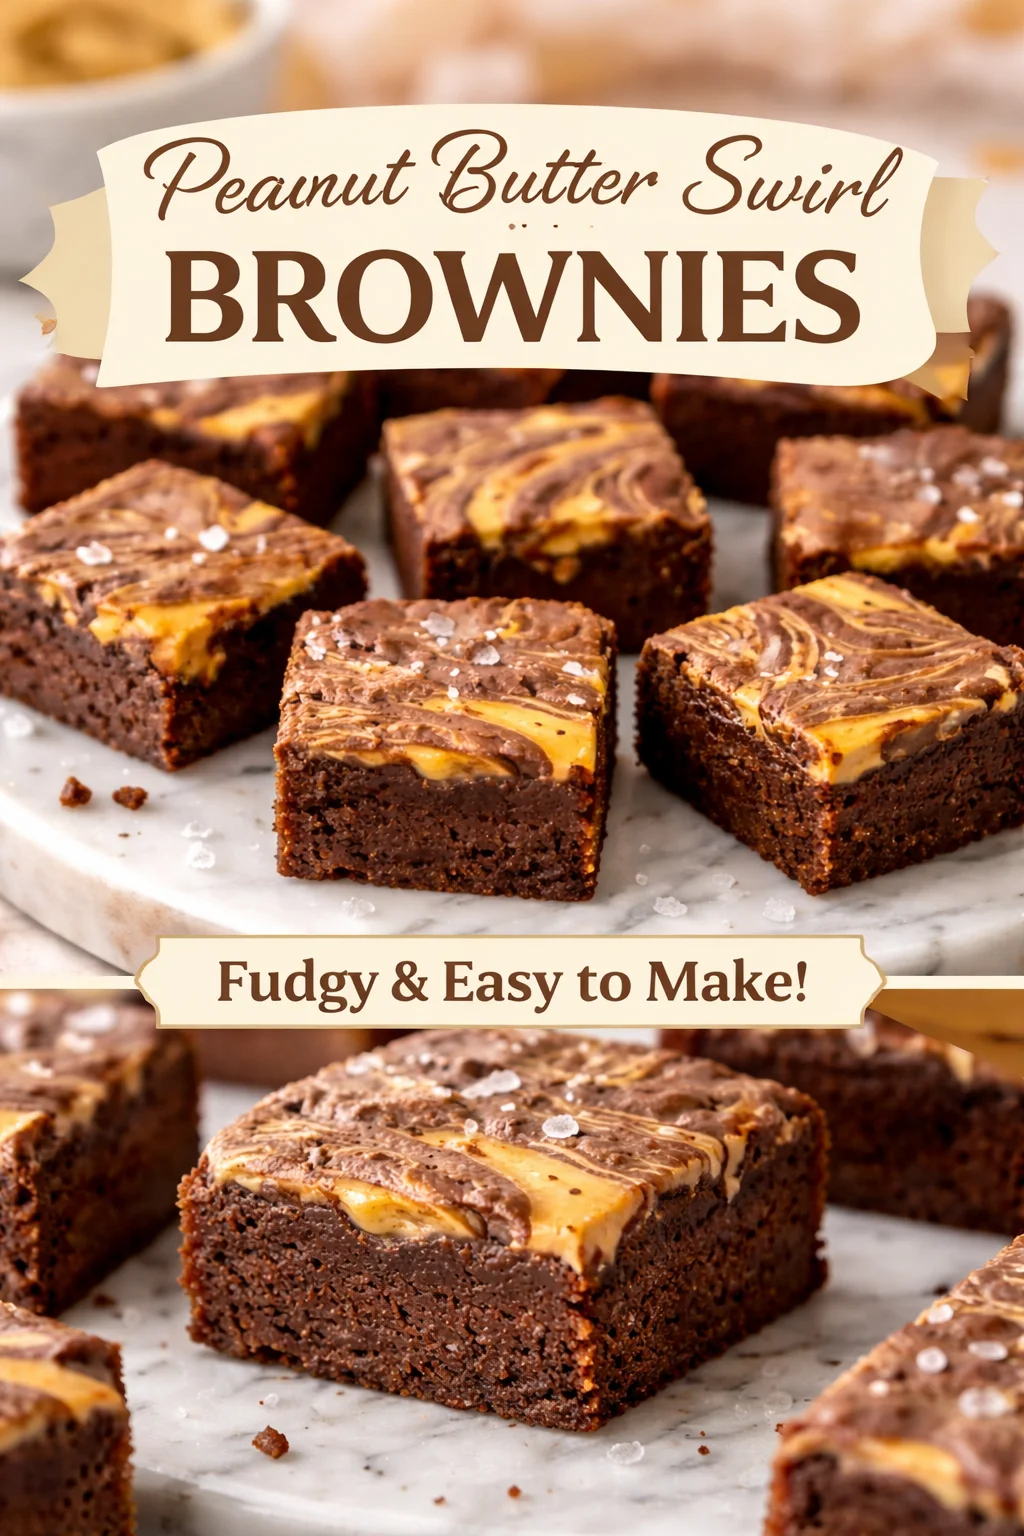
Small-Batch Chocolate Collagen Brownie Bites
Delicious fudgy brownie bites with a cheesecake swirl, perfect for satisfying your chocolate cravings in a small batch.
Servings: 16 bites
Calories: 80kcal
Ingredients
For the brownie bite batter
- 4 tablespoons Unsalted butter, melted or coconut oil for a dairy-free option
- 1/3 cup Granulated sugar or coconut sugar for a slightly deeper flavor
- 1 large Egg Room temperature helps the batter mix smoothly
- 1 teaspoon Vanilla extract
- 1/4 cup Unsweetened cocoa powder Main chocolate flavor
- 2 tablespoons Chocolate collagen peptides or unflavored collagen (if using unflavored, add an extra teaspoon of cocoa)
- 1/4 teaspoon Salt Enhances chocolate flavor
- 2 tablespoons Mini chocolate chips Optional, for added fun
For the cheesecake swirl
- 3 ounces Cream cheese, softened
- 2 tablespoons Powdered sugar or a powdered sugar alternative
- 1/2 teaspoon Vanilla extract
Instructions
Preparation
- Preheat your oven to 350°F (175°C). Lightly grease a mini muffin pan or use mini liners.
- In a bowl, whisk together the melted butter and sugar.
- Add the egg and vanilla and whisk until the mixture is smooth and glossy.
- In a small bowl, combine cocoa powder, collagen, and salt. Mix this dry mixture into the wet mixture and stir until the batter is thick and smooth.
- Fold in the mini chocolate chips if using.
- In another small bowl, mix the softened cream cheese, powdered sugar, vanilla, and egg yolk (or Greek yogurt) until smooth. Keep mixing until it is lump-free.
Baking
- Spoon the brownie batter into each mini cup, filling about two-thirds full.
- Add a small dab of the cheesecake mixture on top of each brownie bite.
- Use a toothpick to swirl the cheesecake mixture gently into the brownie batter.
- Bake for 10 to 13 minutes until the tops look set and slightly shiny, and the centers are not wet.
- Cool in the pan for 10 minutes before removing. For the cleanest bite texture, let them cool fully; for a gooier texture, enjoy one warm.
Notes
Store the brownie bites in the fridge in a covered container for up to 4 days. They can be enjoyed chilled or at room temperature.
What you will see if you watch
If you are the type who likes to watch a recipe once before jumping in, the video is really helpful here. You will see how thick the brownie batter should look, how soft the cream cheese mixture needs to be, and what I mean by a gentle swirl. I also show the exact “done” look, because honestly that is what most people worry about with brownie bites.
One more thing you will catch in the video is that I tap the pan on the counter once before baking. It helps the batter settle into the corners and makes the tops smoother. Tiny move, but it makes them look more bakery style.
Get the Recipe: Flourless Gluten Free Cheesecake Brownie Recipe
Step by step, small batch style
This is written for a mini muffin pan and makes about 12 to 16 brownie bites, depending on how full you fill the cups.
What you will need
- Mini muffin pan
- Mixing bowl and whisk
- Small bowl for the cheesecake swirl
- Toothpick or skewer for swirling
Ingredients
Brownie layer:
- 4 tablespoons butter, melted
- 1/3 cup sugar
- 1 large egg
- 1 teaspoon vanilla
- 1/4 cup unsweetened cocoa powder
- 2 tablespoons collagen peptides (chocolate or unflavored)
- 1/4 teaspoon salt
- 2 tablespoons mini chocolate chips, optional
Cheesecake swirl:
- 3 ounces cream cheese, softened
- 2 tablespoons powdered sugar
- 1/2 teaspoon vanilla
- 1 egg yolk or 1 tablespoon Greek yogurt
Directions
1) Heat your oven to 350 F. Lightly grease a mini muffin pan or use mini liners.
2) In a bowl, whisk melted butter and sugar. Add the egg and vanilla and whisk until smooth and glossy.
3) In a small bowl, mix cocoa powder, collagen, and salt. Add that into the wet mixture and stir until the batter looks thick and smooth. Fold in chocolate chips if using.
4) In another small bowl, mix cream cheese, powdered sugar, vanilla, and egg yolk (or Greek yogurt) until smooth. If it feels lumpy, keep stirring, it will come together as the cream cheese softens.
5) Spoon brownie batter into each mini cup, filling about 2/3 full. Add a small dab of cheesecake mixture on top of each one.
6) Use a toothpick to swirl each bite with a few gentle turns.
7) Bake 10 to 13 minutes. The tops should look set and slightly shiny, and the centers should not look wet.
8) Cool in the pan for 10 minutes, then lift them out. For the cleanest bite texture, let them cool fully. For the gooiest bite texture, eat one warm. No judgment.
Storage
Because of the cheesecake swirl, I store these in the fridge in a covered container for up to 4 days. They are amazing chilled, but I often let them sit on the counter for 10 minutes so they lose that cold edge.
Serving ideas
These Small-Batch Chocolate Collagen Brownie Bites are great plain, but if you want to make them feel like a full dessert moment, try them with berries, a spoon of whipped cream, or a tiny drizzle of peanut butter. If you are packing them for a snack, they travel well once fully cooled.
Common Questions
1) Do these actually taste like collagen?
Nope. In these Small-Batch Chocolate Collagen Brownie Bites, the cocoa and vanilla cover it. I recommend mixing the collagen with the cocoa first to avoid clumps.
2) Can I make them without the cheesecake swirl?
Absolutely. Just bake the brownie batter as is. Start checking around 9 to 12 minutes since they may bake a touch faster without the extra topping.
3) How do I know when brownie bites are done?
The edges look set, the tops look slightly shiny, and a toothpick comes out with moist crumbs, not wet batter. They keep cooking a little as they cool.
4) Can I freeze them?
Yes. Freeze in a single layer first, then move to a freezer bag. Thaw in the fridge overnight. The texture stays fudgy, especially if you do not overbake.
5) What if I only have a regular muffin tin?
It works, you will just get bigger bites and fewer of them. Bake longer, usually 14 to 18 minutes, and keep an eye on the centers.
A sweet little wrap up (and what to bake next)
If you are craving a chocolate treat but you do not want a huge pan tempting you all week, these Small-Batch Chocolate Collagen Brownie Bites are such a good move. They are fudgy, simple, and the cheesecake swirl makes them feel special without extra effort. Keep your bake time on the shorter side, let them cool, and you will get that perfect brownie bite texture. And if you want to explore a similar idea from another baker, I have bookmarked Flourless Gluten Free Cheesecake Brownies – Hummingbird High for extra inspiration. Now go grab your cocoa, make a small batch, and tell me if you eat the first one warm like I always do.
Small-Batch Chocolate Collagen Brownie Bites
Ingredients
For the brownie bite batter
- 4 tablespoons Unsalted butter, melted or coconut oil for a dairy-free option
- 1/3 cup Granulated sugar or coconut sugar for a slightly deeper flavor
- 1 large Egg Room temperature helps the batter mix smoothly
- 1 teaspoon Vanilla extract
- 1/4 cup Unsweetened cocoa powder Main chocolate flavor
- 2 tablespoons Chocolate collagen peptides or unflavored collagen (if using unflavored, add an extra teaspoon of cocoa)
- 1/4 teaspoon Salt Enhances chocolate flavor
- 2 tablespoons Mini chocolate chips Optional, for added fun
For the cheesecake swirl
- 3 ounces Cream cheese, softened
- 2 tablespoons Powdered sugar or a powdered sugar alternative
- 1/2 teaspoon Vanilla extract
Instructions
Preparation
- Preheat your oven to 350°F (175°C). Lightly grease a mini muffin pan or use mini liners.
- In a bowl, whisk together the melted butter and sugar.
- Add the egg and vanilla and whisk until the mixture is smooth and glossy.
- In a small bowl, combine cocoa powder, collagen, and salt. Mix this dry mixture into the wet mixture and stir until the batter is thick and smooth.
- Fold in the mini chocolate chips if using.
- In another small bowl, mix the softened cream cheese, powdered sugar, vanilla, and egg yolk (or Greek yogurt) until smooth. Keep mixing until it is lump-free.
Baking
- Spoon the brownie batter into each mini cup, filling about two-thirds full.
- Add a small dab of the cheesecake mixture on top of each brownie bite.
- Use a toothpick to swirl the cheesecake mixture gently into the brownie batter.
- Bake for 10 to 13 minutes until the tops look set and slightly shiny, and the centers are not wet.
- Cool in the pan for 10 minutes before removing. For the cleanest bite texture, let them cool fully; for a gooier texture, enjoy one warm.
Notes
Similar Posts
Chocolate Coconut Slice
Chocolate Coconut Slice is a delightful treat that combines the rich flavors of chocolate and coconut in a simple, no-bake recipe. This sweet slice is perfect for parties, birthdays, or just when you need a little indulgence. What makes it even more enticing is how quickly you can whip it up with just a handful…
German Spitzbuben Christmas Cookies
German Spitzbuben Christmas Cookies are a delightful addition to any holiday cookie platter. These delightful German treats feature a buttery, nutty flavor and are filled with sweet sour cherry jam. The tradition of making Spitzbuben cookies dates back centuries in Germany, where they are often enjoyed during Christmas festivities. With their beautiful cookie shapes and…
Cranberry Fluff Salad
Cranberry Fluff Salad is a delightful dish that brings a burst of flavor to any gathering. With its balance of tart cranberries, sweet marshmallows, and creamy whipped cream, this salad is a fun and refreshing addition to your holiday table or any potluck. It’s simple to prepare and is sure to become a favorite among…
Easy Mini Turkey Club Pinwheels Recipe
Nothing beats a simple, tasty appetizer that can be whipped up in a matter of minutes and appeals to everyone. Mini Turkey Club Pinwheels are a delightful combination of flavors, making them a hit at parties, picnics, or even for a casual lunch. As a fan of easy, versatile recipes, I love how these pinwheels…
Delicious Flourless Frozen Peanut Butter Pie Cups You’ll Love
Making of: Frozen Gluten Free + Vegan Peanut Butter Cup Pie What you will need Step by step (my low stress method) Nutrition Information Related Recipes Reader Interactions Discover more than 450 proven Jules recipes Common Questions A sweet little freezer habit worth starting Flourless Frozen Peanut Butter Pie Cups are my go to answer…
Vanilla Bean Macadamia Shortbread Cookies
Indulging in buttery, melt-in-your-mouth cookies is a true delight, and these vanilla bean macadamia shortbread cookies exemplify that experience perfectly. The combination of rich butter and the unique fragrance of vanilla beans sets the stage for a luxurious treat. With the crunch of macadamia nuts in every bite, these cookies are an irresistible blend of…