Canadian Delight: Warm, Fruity Selkirk Bannock
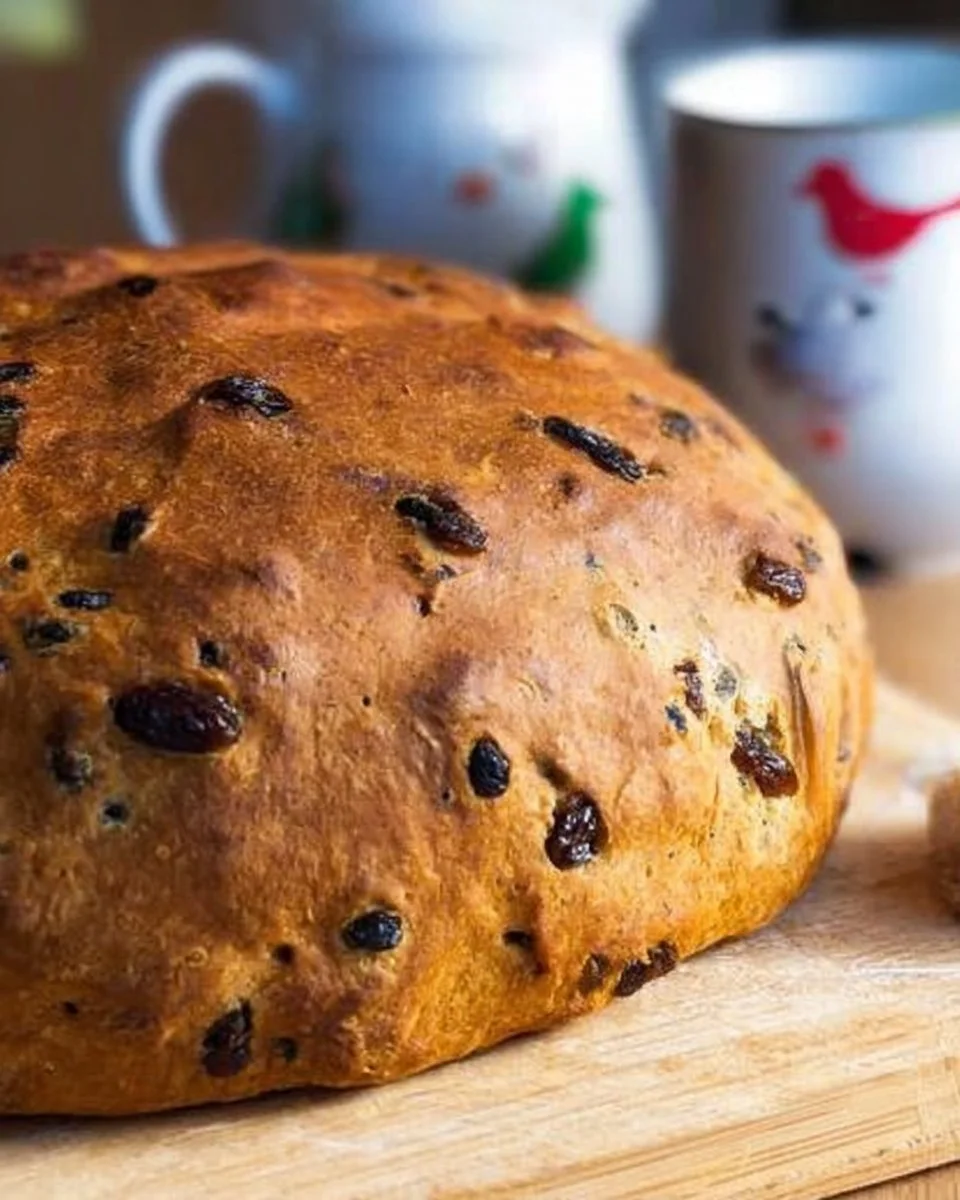
Traditional Selkirk Bannock is a delightful bread that has roots in the Scottish Borders. It’s a treat that’s perfect for breakfast, afternoon tea, or even as a comforting snack. Made with a mixture of strong white flour, sweet brown sugar, and your choice of dried fruits, this recipe yields a beautifully soft and slightly sweet loaf. Whether enjoyed plain, slathered with butter, or toasted, it promises to fill your home with a wonderful aroma that beckons everyone to gather around the table. Let’s dive into how to create this classic delight!
What Goes into This Traditional Selkirk Bannock
Gather the following ingredients to whip up your own Traditional Selkirk Bannock:
- 500g Strong white flour (4 Cups)
- Pinch of salt
- 7g dried instant yeast
- 65g Brown sugar (1/3 Cup)
- 250ml Warm full-fat milk (1 Cup)
- 100g Butter (1/2 Cup)
- 300g Dried fruit (we used sultanas and raisins) (3/4 Cup)
- Milk for a glaze
Step-by-Step Traditional Selkirk Bannock Recipe
-
Mix Dry Ingredients: In a large mixing bowl, combine the strong white flour, brown sugar, salt, and dried yeast. Don’t forget to fold in the dried fruit as well.
-
Heat Butter and Milk: In a saucepan, slowly melt the butter over a low heat. Once completely melted, add the warm milk and whisk them together. Aim for a temperature of about 38°C (if you have a thermometer) — this is optimal for yeast activation.
-
Combine Mixtures: Gradually add the warm milk and butter mixture to the dry ingredients, stirring gently with a wooden spoon.
-
Knead the Dough: Using clean hands, knead the mixture in the bowl for about five minutes. If it feels too sticky, sprinkle in a bit of extra flour gradually until the dough is manageable without over-flouring.
-
First Proving: Cover the bowl with cling film or a damp cloth. Place it in a warm area to prove — we like using the oven set to 40°C if your home is a bit chilly. Allow it to rise for about an hour or until the dough doubles in size.
-
Knock Back the Dough: Once proved, gently knead the dough for another two minutes to knock it back and remove any air bubbles.
-
Shape the Dough: Form the dough into a round shape and place it back in the bowl. Cover it again and leave it to prove until it doubles in size again; this could take 45 minutes to an hour.
-
Prepare for Baking: Line a baking tray with parchment paper. Preheat a fan-assisted oven to 160°C, adjusting for standard ovens as needed.
-
Final Touches: When the dough has finished its second proving, place it onto the prepared baking tray and brush the top with milk for a lovely glaze.
-
Bake: Bake in the oven for 40-50 minutes. Check at around 35 minutes; if it starts to brown too much, cover it loosely with tin foil. Your Selkirk Bannock is done when it sounds hollow when tapped on the bottom.
-
Cool and Serve: Allow the bread to cool on a wire rack before slicing it up.
Serve & Enjoy Traditional Selkirk Bannock
This delightful bread is best served warm. Enjoy it sliced with a pat of butter, or indulge with your favourite jam for added sweetness. It pairs wonderfully with a cup of tea or coffee. For breakfast, try it toasted with honey. And if you’re feeling fancy, consider adding a dollop of clotted cream on top!
Helpful Tricks for Traditional Selkirk Bannock
-
Perfect Proving: If your kitchen tends to be on the cooler side, placing the dough in a switched-off oven with the light on is an excellent way to maintain warmth for faster proving.
-
Fruit Variations: Feel free to play around with the dried fruits you use. Chopped apricots, currants, or cranberries can all add their unique twist to the flavour.
-
Don’t Rush the Knead: Taking your time to knead the dough properly is key to achieving a lovely flat loaf. Don’t skip this step!
Traditional Selkirk Bannock FAQs
What can I use if I don’t have strong white flour?
You can substitute it with all-purpose flour, but the texture might be slightly different. Strong flour gives you that lovely chewy texture.
Can I add spices to my Selkirk Bannock?
Absolutely! A sprinkle of cinnamon or nutmeg can enhance the flavour beautifully. Just a pinch will do!
How long can I store the Selkirk Bannock?
Once baked, your Selkirk Bannock can be stored in an airtight container at room temperature for up to 3 days. You can also freeze it for longer storage.
{image_template}
Give this Traditional Selkirk Bannock a try; it’s sure to become a beloved recipe in your home! Enjoy the process and the delightful results!
Traditional Selkirk Bannock
Ingredients
Main Ingredients
- 500 g Strong white flour (4 Cups)
- Pinch of salt Salt
- 7 g Dried instant yeast
- 65 g Brown sugar (1/3 Cup)
- 250 ml Warm full-fat milk (1 Cup)
- 100 g Butter (1/2 Cup)
- 300 g Dried fruit (sultanas and raisins) (3/4 Cup)
- Milk Milk for a glaze
Instructions
Preparation
- In a large mixing bowl, combine the strong white flour, brown sugar, salt, and dried yeast. Fold in the dried fruit.
- In a saucepan, melt the butter over low heat. Once melted, add the warm milk and whisk until combined, aiming for a temperature of about 38°C for optimal yeast activation.
- Gradually add the warm milk and butter mixture to the dry ingredients, stirring gently with a wooden spoon.
- Knead the mixture in the bowl for about five minutes. If too sticky, sprinkle in a bit of extra flour until manageable.
- Cover the bowl with cling film or a damp cloth and place it in a warm area to prove for about an hour, or until the dough doubles in size.
- Once proved, gently knead the dough for another two minutes to remove any air bubbles.
- Form the dough into a round shape, place it back in the bowl, cover it again, and leave it to prove until it doubles in size again (about 45 minutes to an hour).
Baking
- Line a baking tray with parchment paper and preheat a fan-assisted oven to 160°C.
- Once the dough has finished its second proving, place it onto the prepared baking tray and brush the top with milk for a lovely glaze.
- Bake in the oven for 40-50 minutes, checking around 35 minutes. If it browns too much, loosely cover it with tin foil. It’s done when it sounds hollow when tapped on the bottom.
- Allow the bread to cool on a wire rack before slicing.