Banana Nut Bread

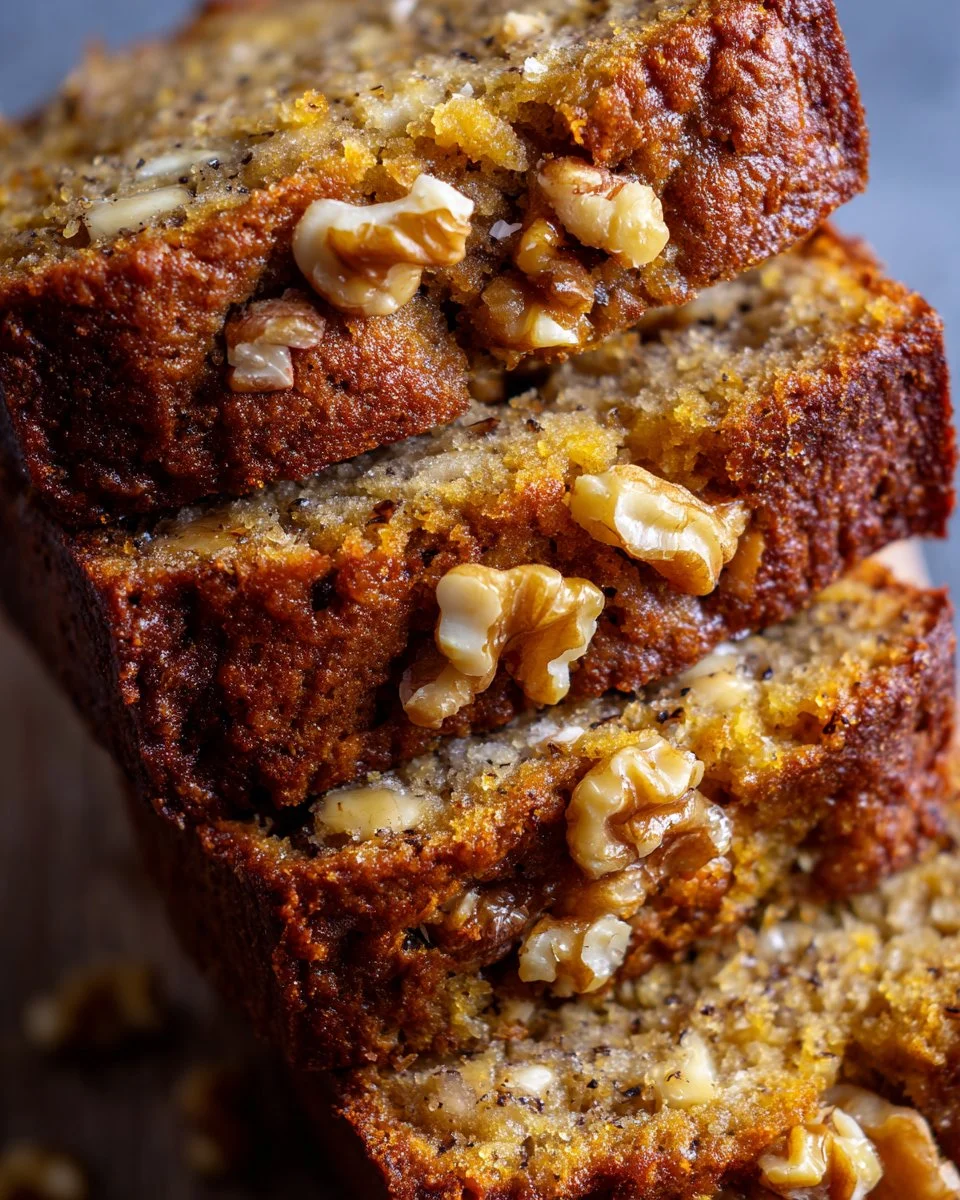
Homemade banana nut bread with walnuts on a wooden cutting board

Banana nut bread is a beloved classic that captures the essence of comfort food with its rich, moist texture and delightful nutty crunch. Made with simple, wholesome ingredients, this easy-to-follow recipe showcases the natural sweetness of ripe bananas, perfectly balanced with the warmth of walnuts or pecans. Whether enjoyed for breakfast, a snack, or as a dessert, this banana nut bread is not only satisfying but also a great way to use up overripe bananas. Its aroma wafting through the kitchen is sure to draw the family together for a warm slice slathered in butter or served plain. Get ready to impress your loved ones and treat your taste buds to a nostalgic bite of this homemade delight.

Why You’ll Love This Recipe

  • Quick and easy preparation, perfect for beginners.
  • Uses common ingredients likely found in your pantry.
  • Versatile; ideal for breakfast, snacks, or dessert.
  • Moist and flavorful, with a delightful nutty addition.
  • Great way to use overripe bananas without waste.

Ingredients

  • 3 ripe bananas, mashed (approximately 450 g)
  • 1/3 cup (75 g) unsalted butter, melted
  • 1 teaspoon (5 g) baking soda
  • Pinch of salt
  • 3/4 cup (150 g) granulated sugar
  • 1 large egg, beaten
  • 1 teaspoon (5 ml) vanilla extract
  • 1 1/2 cups (190 g) all-purpose flour
  • 1/2 cup (60 g) chopped walnuts or pecans

Ingredient Notes

  • Ripe Bananas: Look for bananas with brown spots for the ideal sweetness and flavor.
  • Nuts: Walnuts offer a classic crunch, while pecans provide a sweeter, buttery flavor. Feel free to mix or substitute with chocolate chips for a different twist.
  • Butter: Unsalted butter is recommended to control the salt level of the bread.

Kitchen Tools Needed

  • Mixing bowls
  • Fork or potato masher
  • Loaf pan (9×5 inches or 23×13 cm)
  • Spatula
  • Measuring cups and spoons
  • Oven mitts
  • Wire rack for cooling

Step-by-Step Instructions

  1. Preheat the oven to 350°F (175°C). Grease a loaf pan with butter or line it with parchment paper.
  2. In a mixing bowl, mash the ripe bananas thoroughly using a fork until smooth.
  3. Stir in the melted butter until well combined.
  4. Mix in the baking soda and a pinch of salt to the banana mixture.
  5. Add the sugar, beaten egg, and vanilla extract, stirring until just incorporated.
  6. Gradually add the all-purpose flour, mixing until no dry ingredients remain visible.
  7. Carefully fold in the chopped nuts.
  8. Pour the batter into the prepared loaf pan, giving it a gentle shake to distribute evenly.
  9. Bake in the preheated oven for 60–65 minutes, or until a toothpick inserted into the center comes out clean.
  10. Allow the bread to cool in the pan for about 10 minutes before transferring it to a wire rack to cool completely.

Cooking Tips

  • Ensure your bananas are well-ripened for the best flavor and sweetness.
  • Do not overmix the batter to keep the bread tender and fluffy.
  • For added depth of flavor, consider adding a teaspoon of cinnamon or nutmeg.
  • If your oven tends to run hot, check the bread a few minutes early to prevent overbaking.

Variations

  • Chocolate Chip Banana Nut Bread: Add 1/2 cup (90 g) chocolate chips for a sweet twist.
  • Cinnamon Swirl: Mix a tablespoon of cinnamon sugar into the batter for a warm flavor.
  • Gluten-Free Option: Substitute the all-purpose flour with a gluten-free blend, ensuring it contains xanthan gum for structure.
  • Banana Nut Muffins: Pour the batter into muffin tins to make individual servings, adjusting the baking time to 18–20 minutes.

Serving Suggestions

Slice and serve banana nut bread warm or at room temperature. It pairs wonderfully with a pat of butter or cream cheese spread. Consider serving alongside fresh fruit or a cup of coffee for a delightful breakfast or afternoon treat.

Storage Instructions

Store any leftovers in an airtight container at room temperature for up to 3 days. For longer storage, wrap the bread in plastic wrap and refrigerate for up to a week or freeze for up to 3 months.

Reheating Tips

To enjoy your banana nut bread warm, simply pop a slice in the microwave for about 15-20 seconds, or toast it for a few minutes in a toaster oven until warmed through.

Nutrition Estimate (per slice, makes about 10 slices)

  • Calories: 200
  • Protein: 3 g
  • Carbohydrates: 30 g
  • Fat: 8 g

Recipe Summary Card

  • Prep Time: 15 minutes
  • Cook Time: 65 minutes
  • Total Time: 1 hour 20 minutes
  • Servings: 10
  • Cuisine: American
  • Course: Dessert/Bread
  • Calories: 200

Frequently Asked Questions

  1. Can I use frozen bananas?
    Yes, thaw the bananas before mashing for the best consistency.

  2. How do I know when the bread is done?
    A toothpick inserted in the center should come out clean or with just a few crumbs attached.

  3. Can I make this recipe without nuts?
    Absolutely! Omit the nuts for a nut-free version, or substitute with dried fruit.

  4. What should I do if the bread sinks in the middle?
    This may be due to overmixing or underbaking; check oven temperature and mixing techniques.

  5. Is this recipe easily customizable?
    Yes, you can adjust the sweetness or add spices to tailor it to your taste!

Conclusion

Making banana nut bread is a simple yet satisfying culinary adventure that results in a delicious treat loved by many. With its cozy flavors, this recipe invites your family to gather around the table, enjoying each warm slice. Try it today and enjoy the delightful aroma and taste of homemade banana nut bread!
Banana Nut Bread

A beloved classic that captures the essence of comfort food with its rich, moist texture and delightful nutty crunch. Perfect for breakfast, a snack, or dessert, this banana nut bread is a great way to use up overripe bananas.
Prep Time15 minutes
Cook Time1 hour 5 minutes
Total Time1 hour 20 minutes
Course: Breakfast, Dessert
Cuisine: American
Keyword: Baking, Banana Bread, Banana Nut Bread, comfort food, Dessert
Servings: 10 slices
Calories: 200kcal

Ingredients

Main Ingredients

  • 3 pieces ripe bananas, mashed (approximately 450 g) Look for bananas with brown spots for the ideal sweetness and flavor.
  • 1/3 cup unsalted butter, melted (75 g) Unsalted butter is recommended to control the salt level of the bread.
  • 1 teaspoon baking soda (5 g)
  • 1 pinch salt
  • 3/4 cup granulated sugar (150 g)
  • 1 large egg, beaten
  • 1 teaspoon vanilla extract (5 ml)
  • 1 1/2 cups all-purpose flour (190 g)
  • 1/2 cup chopped walnuts or pecans (60 g) Feel free to mix or substitute with chocolate chips for a different twist.

Instructions

Preparation

  • Preheat the oven to 350°F (175°C). Grease a loaf pan with butter or line it with parchment paper.
  • In a mixing bowl, mash the ripe bananas thoroughly using a fork until smooth.
  • Stir in the melted butter until well combined.
  • Mix in the baking soda and a pinch of salt to the banana mixture.
  • Add the sugar, beaten egg, and vanilla extract, stirring until just incorporated.
  • Gradually add the all-purpose flour, mixing until no dry ingredients remain visible.
  • Carefully fold in the chopped nuts.
  • Pour the batter into the prepared loaf pan, giving it a gentle shake to distribute evenly.

Baking

  • Bake in the preheated oven for 60–65 minutes, or until a toothpick inserted into the center comes out clean.
  • Allow the bread to cool in the pan for about 10 minutes before transferring it to a wire rack to cool completely.

Notes

Ensure your bananas are well-ripened for the best flavor and sweetness. Do not overmix the batter to keep the bread tender and fluffy. For added depth of flavor, consider adding a teaspoon of cinnamon or nutmeg. If your oven tends to run hot, check the bread a few minutes early to prevent overbaking.

Similar Posts

  • Chill Out with Easy Small-Batch Pineapple Coconut Sorbet

    How to Make Sorbet with Fruit Juice Choosing the right juice (and what to avoid) How to Make Sorbet My easy small batch method (no stress) Popular Sorbet Recipes Types of Sorbet Tips for Making Perfect Sorbet Texture tips that actually help Common Questions A cool little treat to keep on repeat Small-Batch Pineapple Coconut…

  • No-Bake Cranberry Pecan Praline Cookies

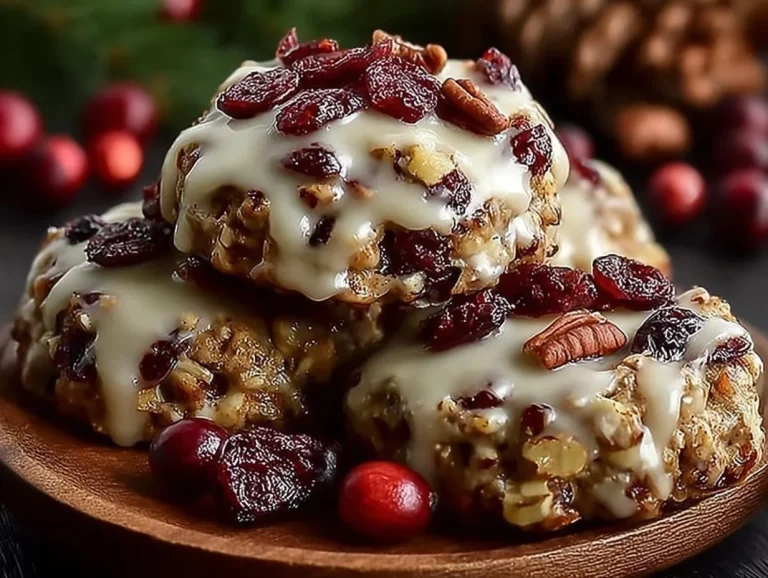
    No-Bake Cranberry Pecan Praline Cookies are a delightful treat that combines sweet, nutty, and chewy textures into every bite. Perfect for when you’re craving something sweet but don’t want to turn on the oven, these cookies are simple to make and don’t require baking! The combination of juicy dried cranberries and crunchy pecans, all coated…

  • Whip Up Small-Batch Mango Coconut Yogurt Swirl Pops at Home!

    Small Batch Mango Coconut Yogurt Swirl Pops are my little solution for those days when it’s too hot to bake, too late to run to the store, and I still want something sweet that feels like a treat. If you’ve ever bought a box of popsicles and felt kind of disappointed after the first bite, same. These are creamy, bright, and super easy to pull together with just a few ingredients. I also love that you can make a small amount and not sacrifice a whole shelf of freezer space. And yes, the swirl is the fun part, even if it turns out a little messy.  Popular Popsicle Recipes I’m a “popsicles all summer” person, but I don’t always want to commit to a giant batch. That’s why I keep coming back to Small-Batch Mango Coconut Yogurt Swirl Pops. They hit that perfect spot between refreshing and creamy, and they don’t taste like you’re chewing on a block of flavored ice. If you want to get into a popsicle groove, here are a few popular directions people usually love, along with how this mango coconut version fits right in: This recipe is firmly in the fruit and yogurt camp, with a little tropical vacation energy thanks to coconut. If you’re a yogurt bowl person, you’d probably also like my cozy breakfast style post here: cozy Canadian caramel apple yogurt bowl. Different vibe, same comforting creamy thing going on. And if you’re the type who likes to keep a small sweet snack stashed away, you might also love these freezer friendly, small batch treats for later: small-batch Almond Joy coconut bars. Coconut people get it. Here’s the simple base I use for these pops: What you’ll need: popsicle molds (or small paper cups), sticks, a spoon, and a small blender or fork for mashing. Core ingredients (for about 4 to 6 pops, depending on your molds): The basic move is: blend mango with coconut milk and a little sweetener, then swirl with yogurt in the molds. Simple, no drama.  Unique Flavor Combinations I’m going to be honest, mango and coconut is already a whole vibe. But once you make Small-Batch Mango Coconut Yogurt Swirl Pops one time, it’s hard not to start brainstorming other combos while you’re washing the blender. My favorite small tweaks that still keep the mango coconut feel: If you want a slightly more “dessert” twist, a chocolate drizzle on top is ridiculous in the best way. I do this when I’m craving something more like candy. Coconut plus chocolate is always a yes, and I’ve got a full-on coconut chocolate situation here if you’re into that combo: chocolate coconut slice. Also, if you’re team mango and you love quick fruity bakes too, check out these little beauties: lime mango puff pastry tartlets. Not popsicles, but definitely the same sunny, tropical mood. How I actually swirl them (because this part feels fancy, but it’s not): Spoon a little mango mixture into the mold, add a spoon of yogurt, then repeat. Use a butter knife or skewer and make 1 to 2 gentle swirls. Stop before it turns into a full blend unless you want a more uniform color. Both taste great, only one looks like a perfect “swirl.” And because I know someone’s going to ask, yes, the swirl looks different every time. Mine are never identical, and that’s kind of the charm. Tips for Perfectly Removing Popsicles from Molds This is the part that can make you feel like a kitchen wizard or like you’re wrestling a tiny frozen brick. The good news is there are a couple tricks that work almost every time. My go-to method: Run the outside of the mold under warm water for 10 to 20 seconds. Not hot, not forever. Then gently wiggle the stick and pull straight out. Extra tips that actually help: I made these with my kids and honestly thought the swirl would be a mess, but they came out so pretty. The warm water trick got them out perfectly and the mango flavor tasted super fresh. One more little thing: if you’re using paper cups, just peel the cup away. Zero stress, and it’s a great “no molds needed” option if you’re making these at a cabin or at someone else’s house. Healthier Popsicle Options One reason I keep making Small-Batch Mango Coconut Yogurt Swirl Pops is that I can control what goes in them. Store-bought pops can be great, but some are basically flavored sugar water. These feel like a snack and a treat at the same time, especially if you use a thicker yogurt. Here are a few easy ways to keep them on the lighter side without making them taste sad: 1) Use ripe mango  The riper the mango, the sweeter it tastes, so you need less added sweetener. 2) Choose the yogurt that fits your goal  Plain Greek yogurt makes them extra creamy and higher in protein. Regular yogurt makes them softer and a bit more classic. 3) Go easy on sweetener  I usually do 1 tablespoon honey, taste, then decide. If your mango is sweet, you might not need any. 4) Add a little fat for better texture  A splash of coconut milk helps with that creamy bite. Pops with zero fat can freeze more icy. If you’re into small batch healthier sweets in general, you might like these too, especially for meal prep snacking: small-batch baked oatmeal cups with no refined sugar. Different format, same “I want something homemade that still feels good” energy. And quick note for anyone with dietary needs: you can absolutely make these dairy-free by using a thick coconut yogurt. The coconut flavor gets even louder, in a good way. Serving Suggestions and Pairings These are great straight from the mold, obviously. But if you want to serve them to friends or make them feel a little extra, here are a few easy ideas that don’t require turning your kitchen into a full event. If you’re doing a snack board moment, I love adding something soft and cozy on the side for people who want options. This one is a favorite in my house: cinnamon swirl banana bread. It’s the kind of thing you slice, set out, and suddenly everyone’s hovering in the kitchen. Also, if you’re serving these at a brunch situation, I’ll sometimes set out little bowls of granola so people can crunch between bites. It’s not fancy, it’s just fun.  Common Questions Can I use frozen mango?  Yes. I use frozen mango all the time. Just thaw it a bit so it blends smoothly, or blend longer and scrape down the sides. Why did my pops turn icy?  Usually it’s too much water and not enough creamy stuff. Try thicker yogurt, a bit more coconut milk, and don’t skip the tiny pinch of salt. How long do they keep in the freezer?  They’re best in the first 2 weeks. After that they’re still safe, but the texture can get a little more freezer-ish. If you can, store them in an airtight container or freezer bag once fully frozen. Do I need popsicle molds?  Nope. Paper cups work great. Fill, cover the top with a little foil, poke in the stick, and freeze. Can I make them higher protein?  Use Greek yogurt and consider adding 1 to 2 teaspoons of chia seeds to the yogurt layer. Let it sit 5 minutes before swirling so it thickens slightly. A sweet little freezer habit you will actually keep…

  • Savory Stuffing Bites

    Savory Stuffing Bites are the perfect bite-sized treat for any gathering, whether it’s a holiday feast, game day, or just a cozy night at home. These little delights pack a flavorful punch with delightful crunch and a savory filling that everyone will love. Made with a wonderful mix of stuffing, sausage, and cheese, they are…

  • Delicious Small-Batch Pistachio Cream Dessert Bars to Savor

    Baked Shortbread Crust What you will need Loaf Pan Small Batch Pistachio Pudding Dessert My simple filling method Recipe Variations Tips for Perfecting Your Pistachio Pudding Little details that make a big difference Recommended Serving Suggestions Common Questions Can I use homemade pudding instead of instant mix? How long do these bars last in the…

Leave a Reply

Your email address will not be published. Required fields are marked *

Recipe Rating