Homemade Twix Bites

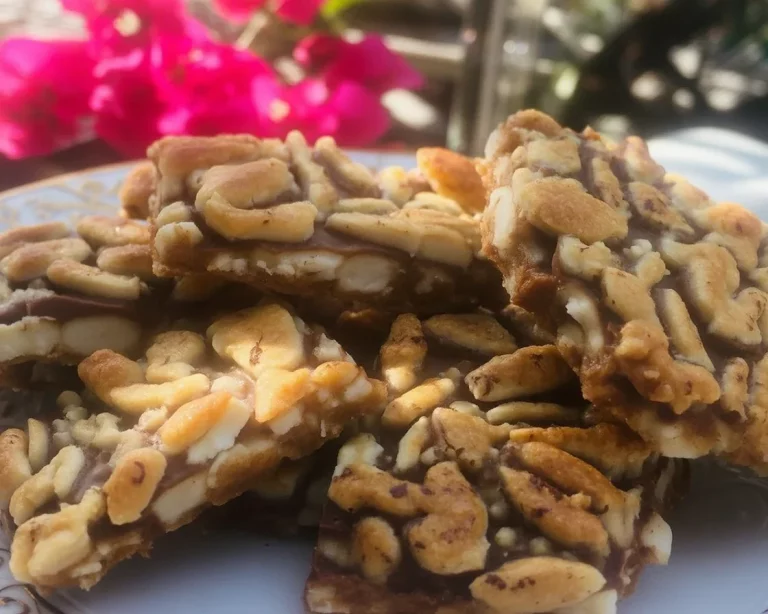
Delicious homemade Twix Bites made with chocolate, caramel, and cookie layers

Homemade Twix Bites are the ultimate treat that combines the delightful crunch of cookies with the creamy goodness of caramel and chocolate. They’re perfect for any occasion, whether it’s a cozy night in, a birthday party, or just because you deserve a sweet treat. These bite-sized snacks are simple to make and are sure to impress anyone who takes a bite. Imagine the sweet caramel melting in your mouth paired with the smooth chocolate coating – irresistible!

What You’ll Need for Homemade Twix Bites

To make your own Homemade Twix Bites, gather the following ingredients:

  • 72 mini Nilla Wafer cookies (or regular-sized)
  • 1 (7 ounce) bag of Rolos, unwrapped
  • 8 ounces chocolate chips or melting chocolate wafers
  • 1 teaspoon coconut oil (optional)

How to Make Homemade Twix Bites

  1. Preheat the Oven: Preheat your oven to 300°F (150°C).

  2. Prepare the Baking Sheet: Line a baking sheet with parchment paper for easy cleanup.

  3. Assemble the Bottom Layer: Place 36 mini Nilla wafer cookies onto the prepared baking sheet. Make sure they are spaced out for even cooking.

  4. Add the Rolo: Put a Rolo candy in the center of each cookie. This will be the delicious gooey center of our treats!

  5. Heat It Up: Place the baking sheet in the oven and heat for 90 seconds. This will soften the Rolos.

  6. Top with Another Cookie: Remove the tray from the oven and gently place another cookie on top of each Rolo, pressing down slightly but not flattening the Rolo.

  7. Chill the Cookie Sandwiches: Put the tray in the refrigerator for 15 to 20 minutes, or until the chocolate is set and the cookies are firm.

  8. Melt the Chocolate: While the cookies chill, melt your chocolate using a double boiler or microwave. If you’re using chocolate chips, add coconut oil to make the chocolate easier to dip.

  9. Dip the Cookie Sandwiches: Once melted, dip each cookie sandwich into the chocolate, letting the excess dribble off before placing it back on the baking sheet.

  10. Let it Harden: Refrigerate until the chocolate has completely hardened.

  11. Store Your Delicious Treats: Store your Homemade Twix Bites in an airtight container for up to 2 weeks.

Serve & Enjoy Homemade Twix Bites

These sweet treats can be enjoyed in many ways. You can serve them on a decorative plate for a party, or keep them in a cute jar for an everyday snack. They pair wonderfully with a cold glass of milk or a warm cup of coffee, making them the perfect pick-me-up. If you’re feeling extra fancy, you might even drizzle a little extra melted chocolate on top for some added flair.

Helpful Tricks for Homemade Twix Bites

  • Swap the Coatings: Feel free to experiment with different types of chocolate. Dark chocolate or white chocolate can make a delicious twist on the classic flavor.

  • Add Toppings: Before the chocolate hardens, sprinkle some sea salt or chopped nuts on top for added texture and flavor.

  • Play with Sizes: If you prefer a smaller bite, use mini Nilla wafers and cut the Rolos in half for a more snackable size.

Homemade Twix Bites FAQs

Can I use a different kind of cookie?
Absolutely! Any vanilla-flavored cookies will work. Just be mindful of the texture and flavor balance.

How long do these treats last?
If stored in an airtight container, your Homemade Twix Bites can last up to 2 weeks.

Can I freeze these bites?
Yes! You can freeze them for up to 2 months. Just make sure to separate layers with parchment paper to prevent sticking.

Indulge yourself by trying out these Homemade Twix Bites – they’re simpler to make than you think and incredibly rewarding. Whether you’re making them for a gathering or just for a special treat at home, they’re sure to be a hit. Enjoy every single bite!

Homemade Twix Bites

Indulge in these bite-sized snacks that combine crunchy cookies with gooey caramel and smooth chocolate, perfect for any occasion.
Prep Time15 minutes
Cook Time1 minute
Total Time16 minutes
Course: Dessert, Snack
Cuisine: American
Keyword: Chocolate Treats, Easy Desserts, Homemade Candy, Snack Ideas, Twix Bites
Servings: 36 pieces
Calories: 150kcal

Ingredients

Cookie Base and Filling

  • 72 pieces mini Nilla Wafer cookies (or regular-sized)
  • 1 bag (7 ounce) Rolos, unwrapped

Chocolate Coating

  • 8 ounces chocolate chips or melting chocolate wafers
  • 1 teaspoon coconut oil (optional) Added to make chocolate easier to dip.

Instructions

Preparation

  • Preheat your oven to 300°F (150°C).
  • Line a baking sheet with parchment paper for easy cleanup.
  • Place 36 mini Nilla wafer cookies onto the prepared baking sheet, spaced out for even cooking.
  • Put a Rolo candy in the center of each cookie.
  • Place the baking sheet in the oven and heat for 90 seconds to soften the Rolos.
  • Remove the tray from the oven and gently place another cookie on top of each Rolo, pressing slightly.
  • Refrigerate for 15 to 20 minutes, until the chocolate is set and the cookies are firm.

Coating

  • Melt the chocolate using a double boiler or microwave, adding coconut oil if using chips.
  • Dip each cookie sandwich into the melted chocolate, letting excess drip off before placing it back on the baking sheet.
  • Refrigerate until the chocolate has completely hardened.
  • Store in an airtight container for up to 2 weeks.
Notes

Experiment with different types of chocolate and add toppings like sea salt or chopped nuts for extra flavor. You can also freeze these for up to 2 months.

Similar Posts

  • Sweet & Simple Small Batch Almond Joy Coconut Bars

    Ingredient Notes and Substitutions The essentials Easy substitutions How to Make Almond Joy Cookies Step by step Preparation Tips Featured Recipe Variations Fun twists to try More Cookie Recipes Common Questions Ready to bake a cozy little batch? Small Batch Almond Joy Coconut Bars are what I make when cravings hit at 8 p.m. and…

  • Delicious Small Batch Cinnamon Sugar Donut Muffins You’ll Love!

    Ingredients What you need Instructions Step by step Tiny tips for success Nutrition Facts Swaps and lighter tweaks Related Recipes Photos of Donut Muffins Common Questions Can I double the recipe? How do I store them? Can I make them without eggs? What if I only have salted butter? Can I air fry these? Ready…

  • Persian Walnut Cookies

    Persian Walnut Cookies are a delightful treat that brings together rich flavors and a unique texture. Traditionally crafted in Persian culture, these cookies are not just delicious; they also hold a special place in many hearts, often enjoyed during festive occasions and family gatherings. With the earthy taste of walnuts and a hint of cardamom,…

  • Delicious Small Batch Carrot Cake Cupcakes with Cream Cheese Frosting

    Why You’ll Love This Recipe Expert Baking Tips Recipe Variations Easy Mix-in Ideas Frosting Twists How To Make Carrot Cake Cupcakes Ingredients Cream Cheese Frosting Step-by-Step Related Recipes Common Questions Ready to Bake Your New Favorite Treat Small Batch Carrot Cake Cupcakes with Cream Cheese Frosting are the answer when you’re craving something cozy but…

  • Delectable Small Batch Red Velvet Cookie Sandwiches You’ll Love

    Understanding Red Velvet Brownies My small-batch cookie sandwich formula Tips for Baking Perfect Brownies Quick ingredient swaps that work Variations on Brownie Recipes Common Mistakes to Avoid When Baking Serving Suggestions and Pairings Common Questions How do I keep the cookies soft for days? Can I make the dough ahead? What filling do you use?…

  • Delicious No-Sugar Chocolate Banana Ice Cream Sandwiches Recipe

    No-Sugar Chocolate Banana Ice Cream Sandwiches are my go to fix when I want something cold and chocolatey but I do not want a sugar crash after. You know that moment when you want dessert, but also want to feel good about it? That is exactly where these little sandwiches live. They are creamy, sweet in a real banana kind of way, and honestly pretty fun to make. I started making them during hot afternoons when my freezer was packed with random bananas I forgot about. Now they are a regular thing around here, especially when I want a treat that still feels like real food.  How to make this vegan chocolate banana ice cream This is the part where you realize you do not need an ice cream machine, fancy ingredients, or a long ingredient list. The base is just frozen bananas plus cocoa powder, and then you can build from there. What you will need If you are in a banana baking mood too, you might also like these super moist chocolate chip banana bread slices for breakfast the next day. I swear bananas are either on the counter for one hour, or they are suddenly brown and begging to be used. Quick directions (my real life method) Drop the frozen banana slices into a food processor or a strong blender. Add cocoa powder, a small splash of plant milk, vanilla if using, and that pinch of salt. Blend, scrape down, blend again. At first it looks crumbly and like it will never turn into anything, but keep going. It turns into a thick soft serve texture, and that is your vegan chocolate banana ice cream. Now for the sandwiches. Scoop the chocolate nice cream onto one cookie, top with another cookie, and gently press. If the nice cream is super soft, you can freeze the assembled sandwiches for 30 to 60 minutes so they firm up and become easier to eat. Sometimes I roll the sides in chopped nuts or cacao nibs if I have them. Sometimes I do nothing and just eat one over the sink. Both options are valid. What makes these ice cream sandwiches healthy? I am not into calling desserts magic health food, but these truly are a better option when you want something sweet without added sugar. The sweetness comes from fruit, and the texture comes from the frozen banana doing its thing. That is why No-Sugar Chocolate Banana Ice Cream Sandwiches feel like a treat, but still sit lightly. Here is what I love about them: For the cookie part, you can keep it simple. If you already have a banana based snack in your rotation, these delicious small batch banana oatmeal cookies no flour no sugar are honestly a great jumping off point. They are naturally sweet, and they freeze well too, which makes them perfect sandwich material. “I made a batch on Sunday and my kids thought it was regular ice cream. The best part is I did not have to argue about dessert turning into a sugar frenzy. We are keeping these in the freezer all summer.” How do you freeze bananas for nice cream? Freezing bananas sounds easy, and it is, but there are a couple little things that make the blending part so much smoother. If you freeze bananas the right way, you will get that thick creamy texture instead of icy chunks that fight your blender. Here is my method: 1) Use ripe bananas. You want the peels to have lots of brown spots. That is where the sweetness is. 2) Slice them before freezing. I do coins, about half an inch thick. Whole frozen bananas are a pain to blend. 3) Freeze on a tray first. Lay slices on parchment so they do not freeze into one giant banana brick. After they are frozen solid, toss them into a freezer bag or container. 4) Label the bag. This sounds extra until you find five mystery freezer bags later. If you are like me and end up with extra bananas every week, you might also enjoy baking them into banana chocolate chip mini muffins. I make those when I want something grab and go, and I freeze a few for later just like I do with banana slices. One more thing. If your blender is struggling, let the banana slices sit on the counter for 3 to 5 minutes. Not long enough to melt, just enough to take the icy edge off. What is Nice Cream? Nice cream is basically the internet nickname for blended frozen bananas that turn into an ice cream like texture. The banana acts like the creamy base, so you do not need heavy cream, condensed milk, or added sugar to make it satisfying. The flavor is super customizable. You can turn it into chocolate, peanut butter, strawberry, coffee, or even a cinnamon vibe. For this recipe we are going all in on chocolate banana, which is why these No-Sugar Chocolate Banana Ice Cream Sandwiches taste like a real dessert even though the base is fruit. Nice cream is best right after blending if you like soft serve. If you want scoopable and firm, freeze it for 1 to 2 hours in a container. Just know that it freezes harder than regular ice cream, so you may need to let it sit out a few minutes before scooping. Also, if you love no sugar added chocolate desserts, I have to point you to this cozy one: indulgent small batch coconut milk chocolate pudding no sugar added. It hits that same chocolate craving in a different way. A few tips for the perfect chocolate banana ice cream every time I have made this enough times to know where things can go weird. Here are the tips that keep it smooth, chocolatey, and sandwich worthy. Do not add too much plant milk at the start. Start with one tablespoon, then add more only if your machine needs help. Too much liquid makes it more like a smoothie, and then it leaks out of the cookies. Use good cocoa powder. You do not need fancy, but use one you actually like the taste of. If it tastes bitter in your pantry, it will taste bitter in your nice cream. Salt matters. A tiny pinch makes the chocolate taste deeper. Not salty, just better. Freeze the sandwiches after assembling. If you want that classic ice cream sandwich bite, freeze them on a tray first, then wrap individually. They keep well for about 2 weeks, though in my house they disappear faster. Cookie options that work. You want something that is sturdy enough to hold up, but not so hard that it is tough to bite when frozen. If you need another chocolate snack idea, these chocolate almond bites can be a fun side treat with your coffee while the sandwiches chill. Make them mini. This is my sneaky trick for portioning without feeling restricted. Mini No-Sugar Chocolate Banana Ice Cream Sandwiches are also easier for kids, and they freeze faster. Common Questions 1) Do these taste like bananas?  Yes, but in a good way. Chocolate covers a lot of it, and using ripe bananas makes it taste more like natural sweetness than banana flavoring. 2) Can I make these without a food processor?  A high powered blender works, but you will need to stop and scrape more often. If it is a small blender, blend in batches and use a little plant milk to help it move. 3) How long do they last in the freezer?  About 2 weeks for best texture. Wrap them individually so they do not pick up freezer smells. 4) Why did my nice cream turn icy?  Usually it is too much liquid, or the bananas were not ripe enough. Ripe bananas and minimal milk make it creamy. 5) Can I add peanut butter or protein powder?  Peanut butter is amazing, start with one tablespoon. Protein powder can work, but it can make the texture thicker and a bit chalky depending on the brand, so add slowly. Freezer friendly dessert that actually hits the spot If you try these No-Sugar Chocolate Banana Ice Cream Sandwiches, you will see why I keep bananas in my freezer like it is my job. They are simple, flexible, and they satisfy that chocolate craving without needing added sugar. Keep a batch stashed for late night cravings, hot afternoons, or the moment you want dessert but still want to feel good after. If you want another similar idea, this linked recipe for Healthy 4-Ingredient Chocolate Banana Ice Cream is also a great reference for extra variations. Now go rescue those ripe bananas on your counter and make yourself a couple sandwiches for later.  These No-Sugar Chocolate Banana Ice Cream…

Leave a Reply

Your email address will not be published. Required fields are marked *

Recipe Rating